How To Draw a Cowboy Hat
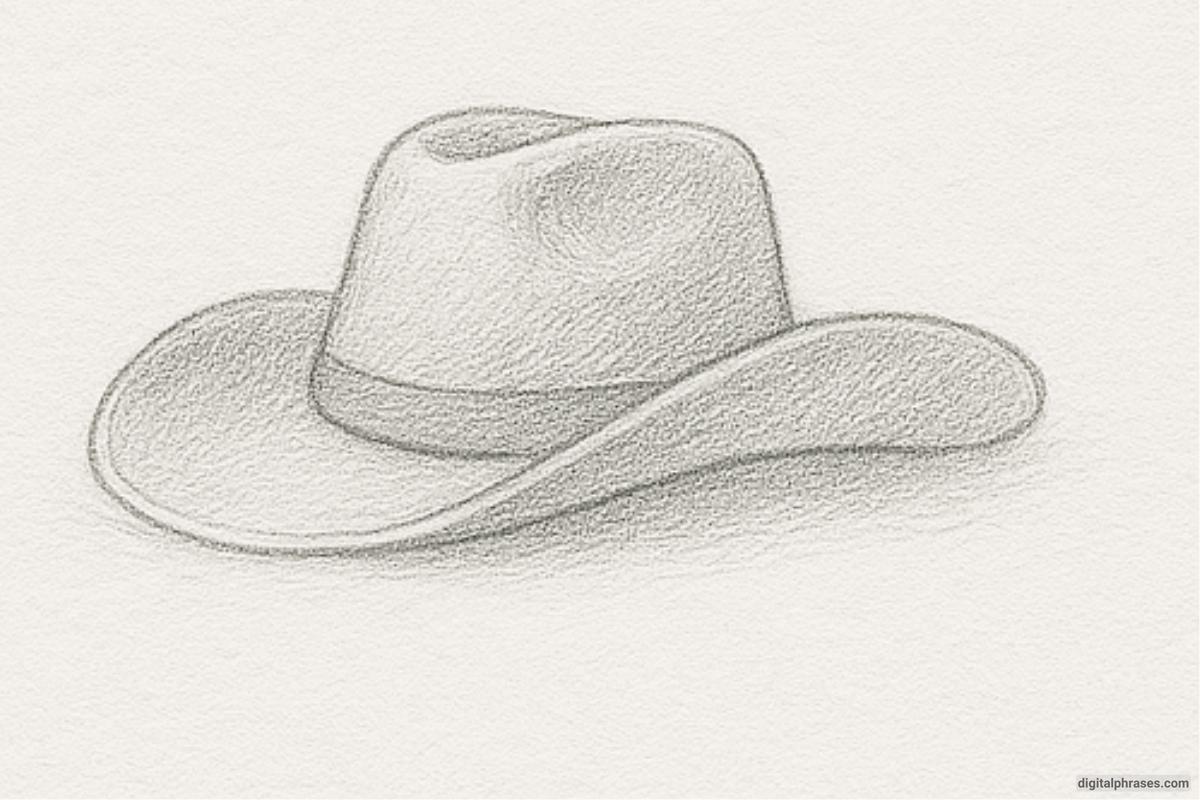
Here’s a step-by-step process on how to draw a cowboy hat.
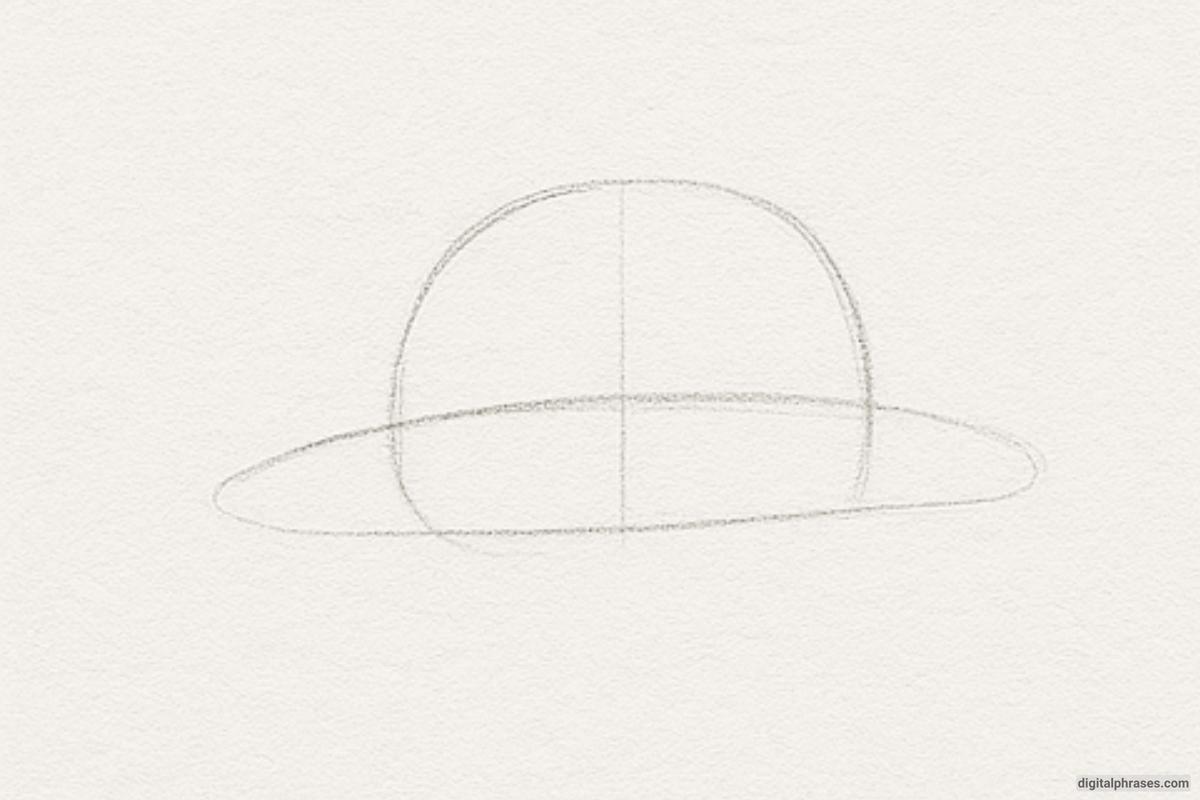
Step 1 – Draw the Basic Framework
- Start by sketching a vertical oval shape lying flat — this will represent the brim of the hat seen in perspective.
- Above the brim, draw a dome-like shape representing the crown of the hat. It should be tall and rounded, centered with light vertical and horizontal guidelines to help with symmetry.
- These shapes create the overall structure and orientation of the hat.
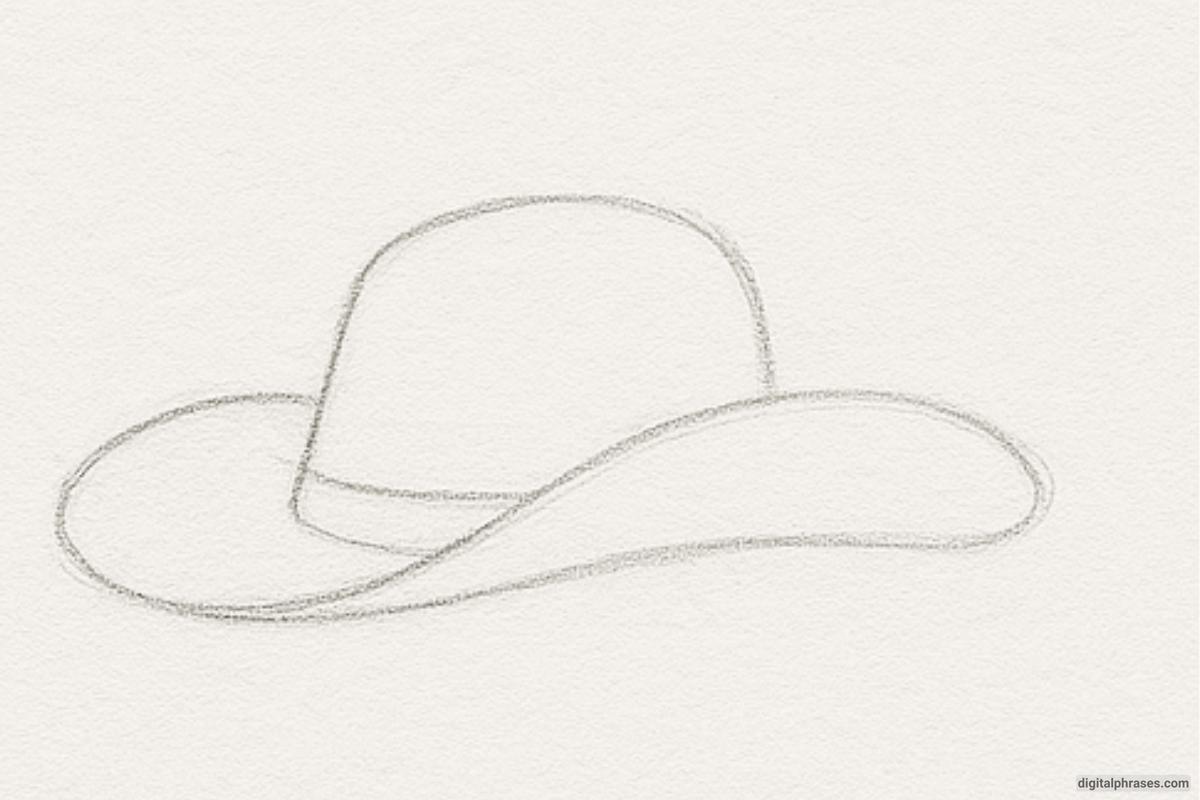
Step 2 – Define the Hat’s Outline
- Refine the crown by adjusting its edges to reflect a more organic and natural cowboy hat form — it should bulge slightly at the sides and dip subtly in the front.
- Reshape the brim to make it wave slightly upward on both ends. This gives the hat that classic flared-out look.
- Add a light band at the base of the crown to represent the hatband. This will help define the hat’s character and structure.
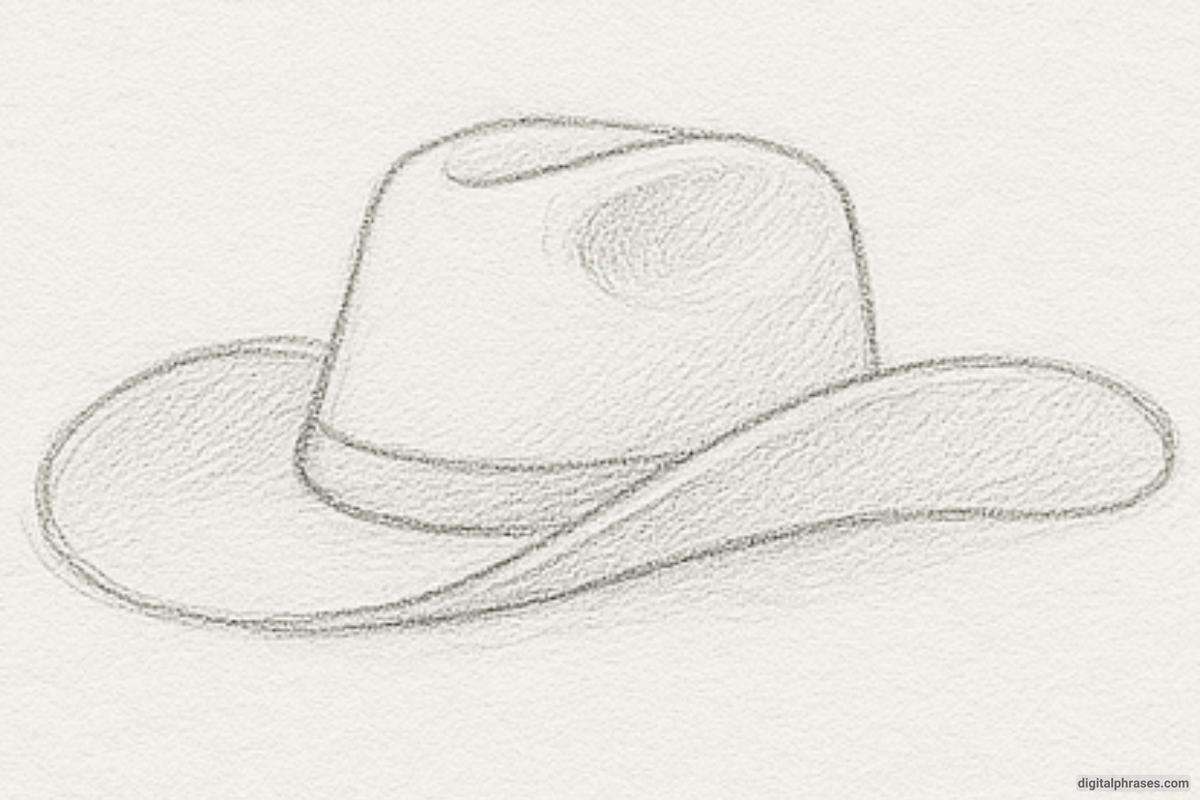
Step 3 – Add Depth and Detail
- Start shading the crown to suggest curvature — darker near the edges, lighter in the center to create volume.
- Do the same with the brim, adding subtle gradients to emphasize the dips and curves. The brim should appear to fold and turn, giving it a dynamic appearance.
- Add texture to the hatband, perhaps with light lines or tonal contrast, to set it apart from the crown.
Step 4 – Finalize with Shading and Finishing Touches
- Deepen the shadows, especially where the brim meets the crown and underneath the brim for realistic contrast.
- Add light creases or dents at the top of the crown — this classic feature gives cowboy hats their rugged personality.
- Refine the outer edges with smooth, clean lines, enhancing the shape and making the drawing crisp.
- Apply final shading across the entire hat with a soft hand, using curved lines to follow the form and create texture, especially on the brim.
- Lastly, soften any harsh lines and smooth the shading to blend everything seamlessly.
