How To Draw Anime Eyes
Here’s a step-by-step guide on how to draw anime eyes.
Step 1: Start with the Eye Contours
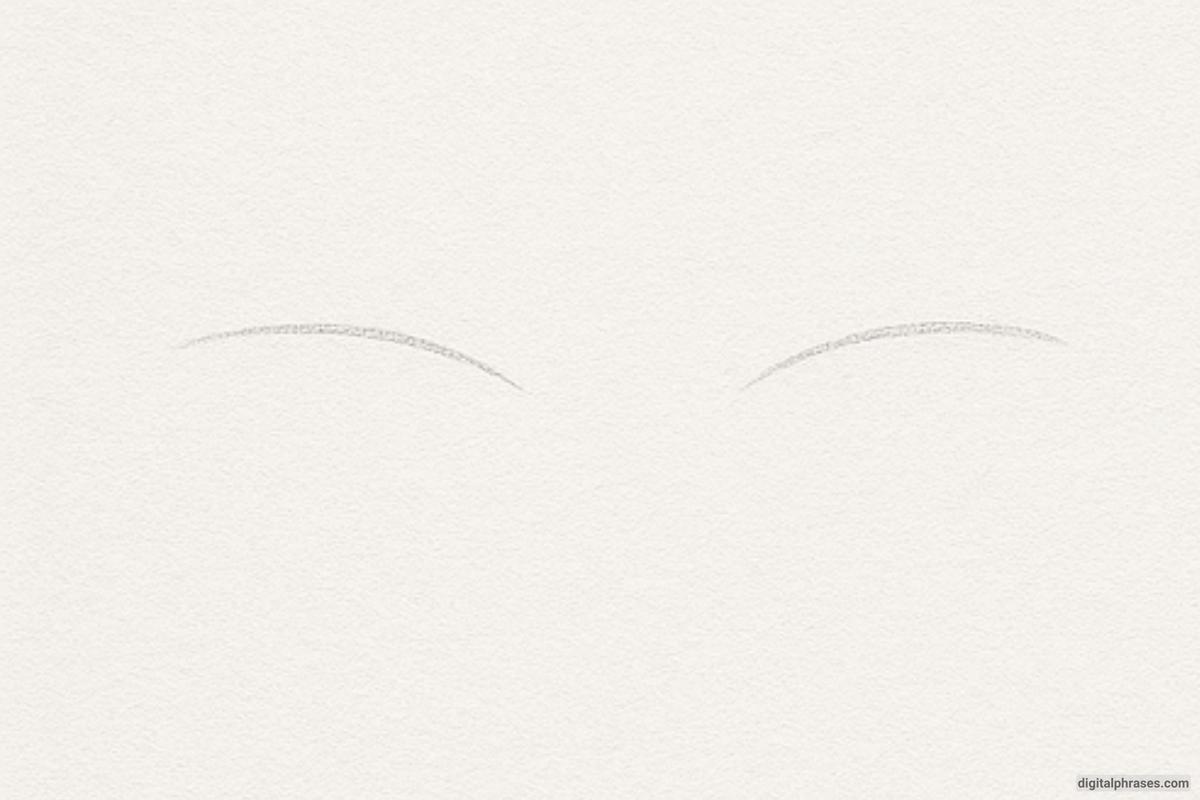
Let’s begin by drawing the top curves of the eyes. These will become the upper eyelids and set the width and angle for the eyes.
Draw two soft arcs, slightly angled and symmetrical, leaving enough space between them for the nose bridge.
Keep your strokes light so you can easily adjust them if needed. Think of this step as laying the architectural foundation of the eyes—you’re just setting up the space right now.
Step 2: Define the Eye Shapes
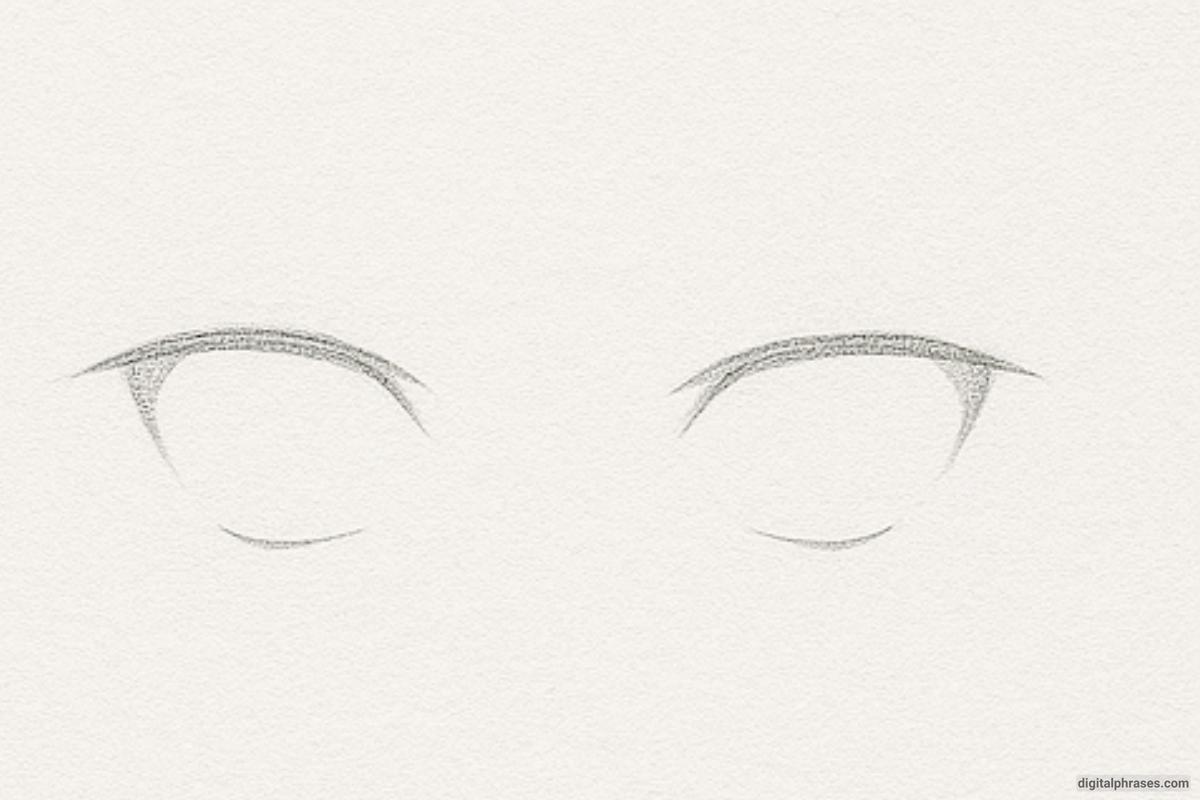
Now that we’ve placed the top eyelids, it’s time to add the rest of the eye outline.
Draw the lower eyelid beneath each arc, forming the full eye shape.
You can now also begin thickening the top lines—anime eyes usually have a bold upper lash line that defines their dramatic look.
Notice that the lines are not perfectly almond-shaped; they’re slightly stylized and open, giving them that classic anime expression. Keep the inner corners subtle and the outer corners gently flared.
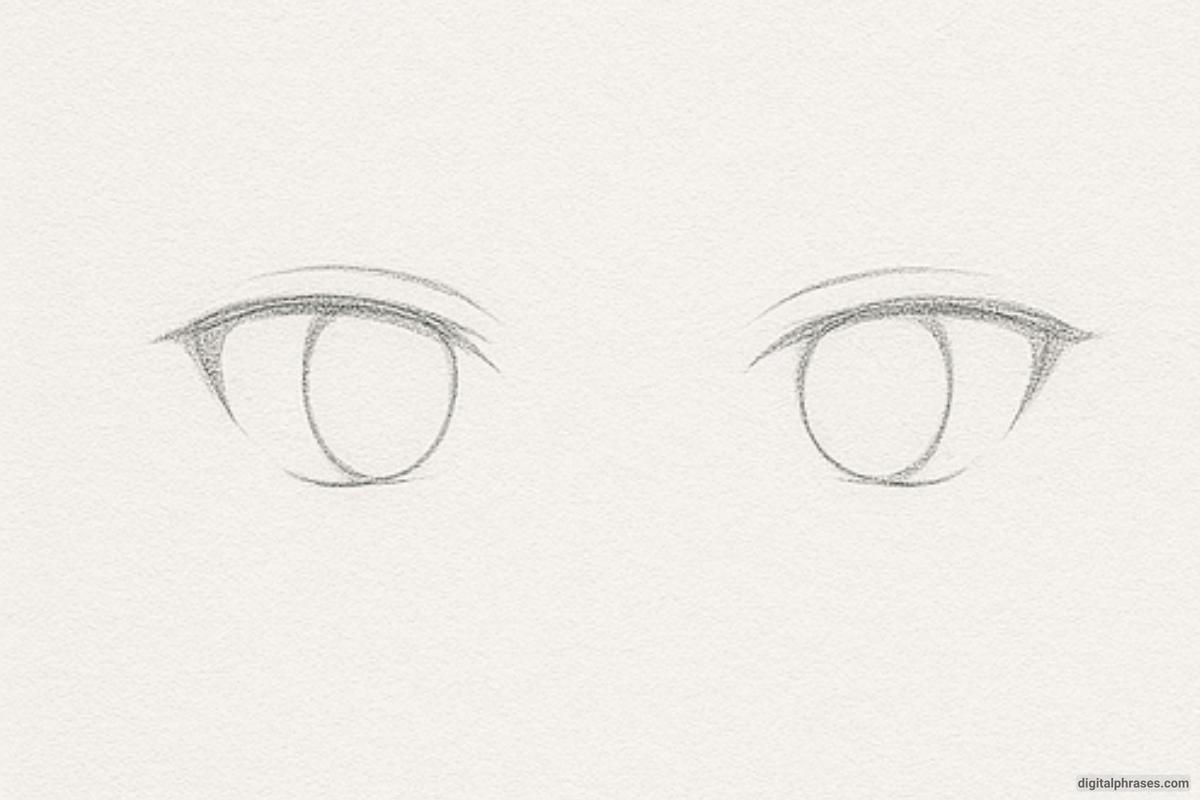
Step 3: Draw the Iris and Pupil
Here’s where the eyes really start to take shape. Inside each eye, draw a large circular shape for the iris.
Anime eyes often have oversized irises, which help create that expressive, youthful look. Within each iris, sketch a smaller circle to mark the pupil.
Make sure the pupils are centered and similar in size. This step is key for giving the eyes their focus and symmetry, so take your time here.
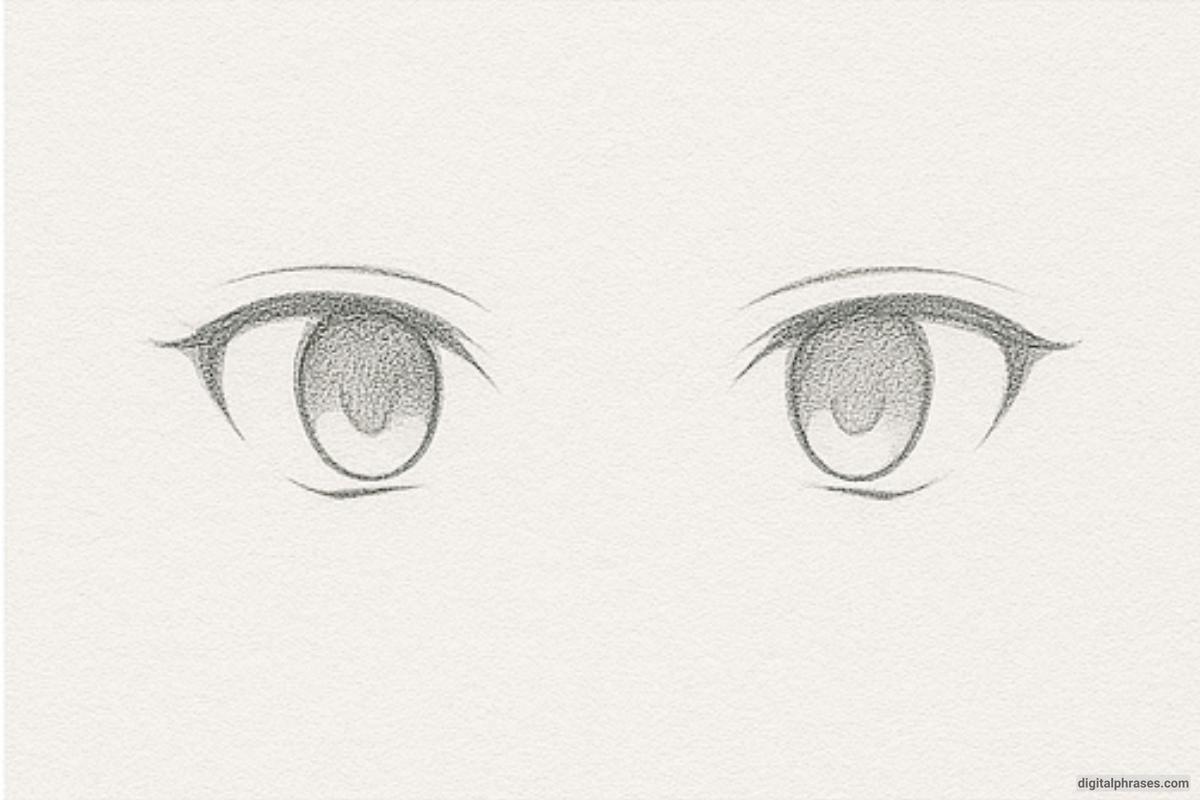
Step 4: Add Shading and Highlights
Let’s bring those eyes to life! Begin shading in the pupils and add some gradient shading to the irises to give them depth.
Leave one or two small areas unshaded to act as light reflections—these highlights add a sparkle that’s signature to anime eyes.
You can darken the upper iris slightly to create a shadow under the eyelid. Don’t forget to add the lower lashes and a bit of thickness to the outer corners for more character.
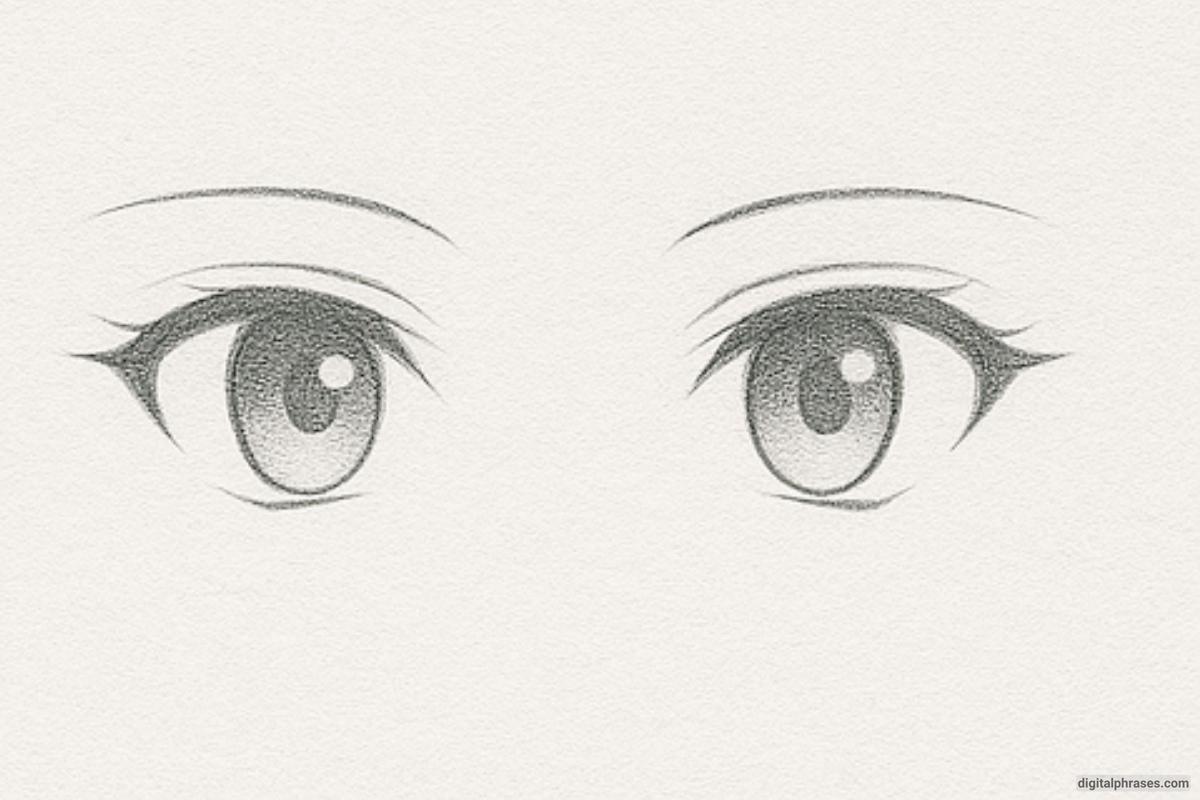
Step 5: Final Details and Polish
In this final step, refine everything. Clean up any construction lines, deepen the darkest shadows, and sharpen the highlights.
Add the eyebrows above the eyes, curving gently and reflecting the mood or emotion of the character. You can also add small details like eyeliner flicks or thicker lash ends for dramatic flair.
At this point, your anime eyes should look expressive, polished, and full of personality.
Equipment Needed to Draw Anime Eyes
- Drawing Paper or Sketchbook – Choose a smooth surface that works well with pencils and allows for clean erasing.
- Pencils (Range from HB to 4B) – HB or 2B for sketching the outlines and 3B to 4B for deep shadows and final touches.
- Eraser (preferably kneaded) – Perfect for correcting fine lines and lifting out highlights inside the eye.
- Pencil Sharpener – A sharp tip helps you draw those clean lashes and crisp reflections.
- Blending Tool (optional) – You can use a blending stump to soften the iris shading if needed.
- Ruler or Compass (optional) – If you want to ensure symmetrical eyes or perfectly round pupils.
- Reference Images – Helpful for exploring different anime eye styles (e.g., soft, fierce, sad, excited).

