How To Draw a Corset
Here’s a step-by-step process on how to draw a corset.
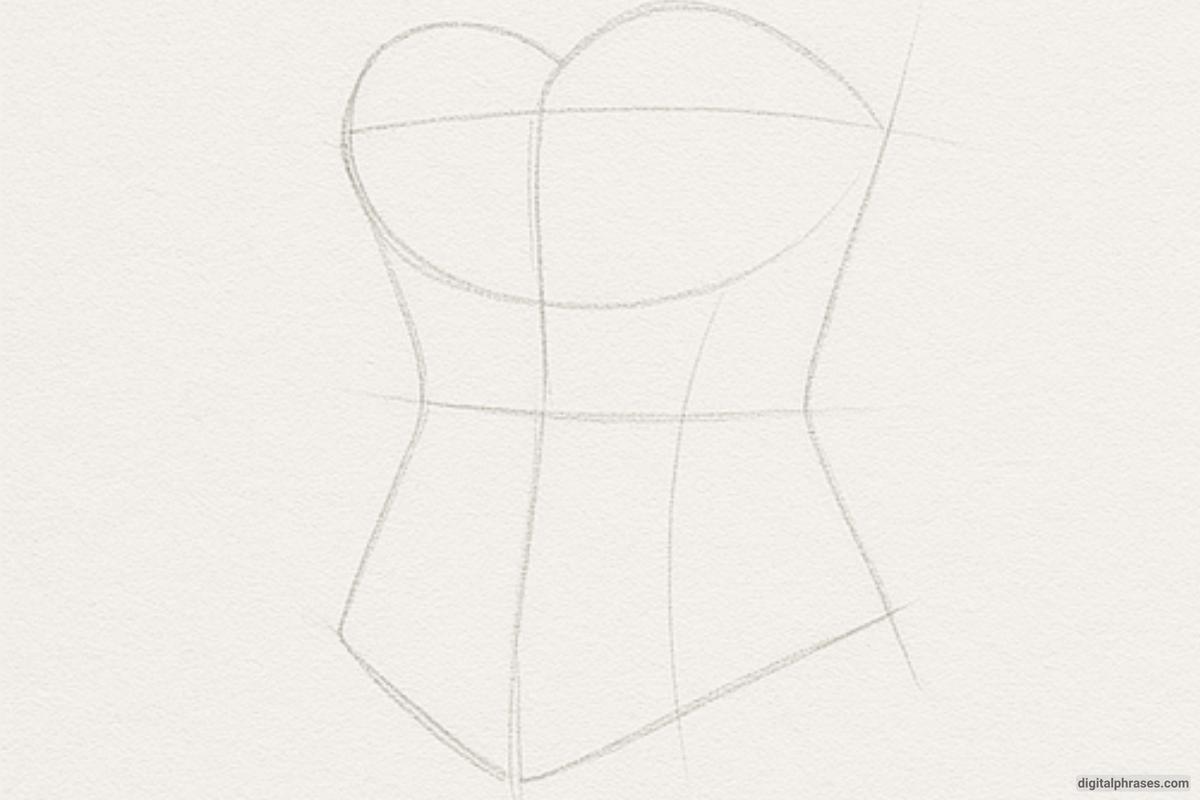
Step 1 – Draw a Basic Framework
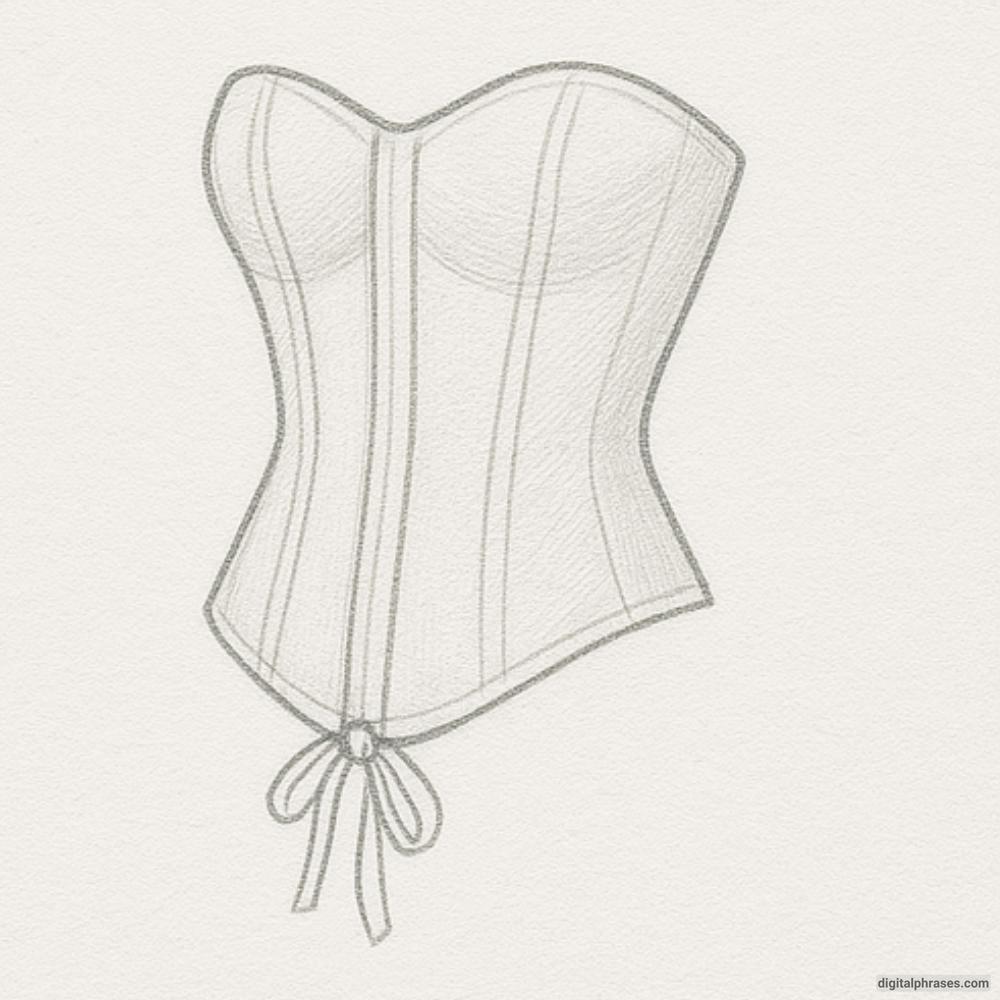
- Begin by sketching a simple outline of the corset. Use light guidelines to form the basic shape and proportions. Draw vertical lines that mark the structure of the corset, and lightly indicate the curved shape of the top and bottom sections.
- This first step serves as the skeleton, providing a foundation for more detailed work.
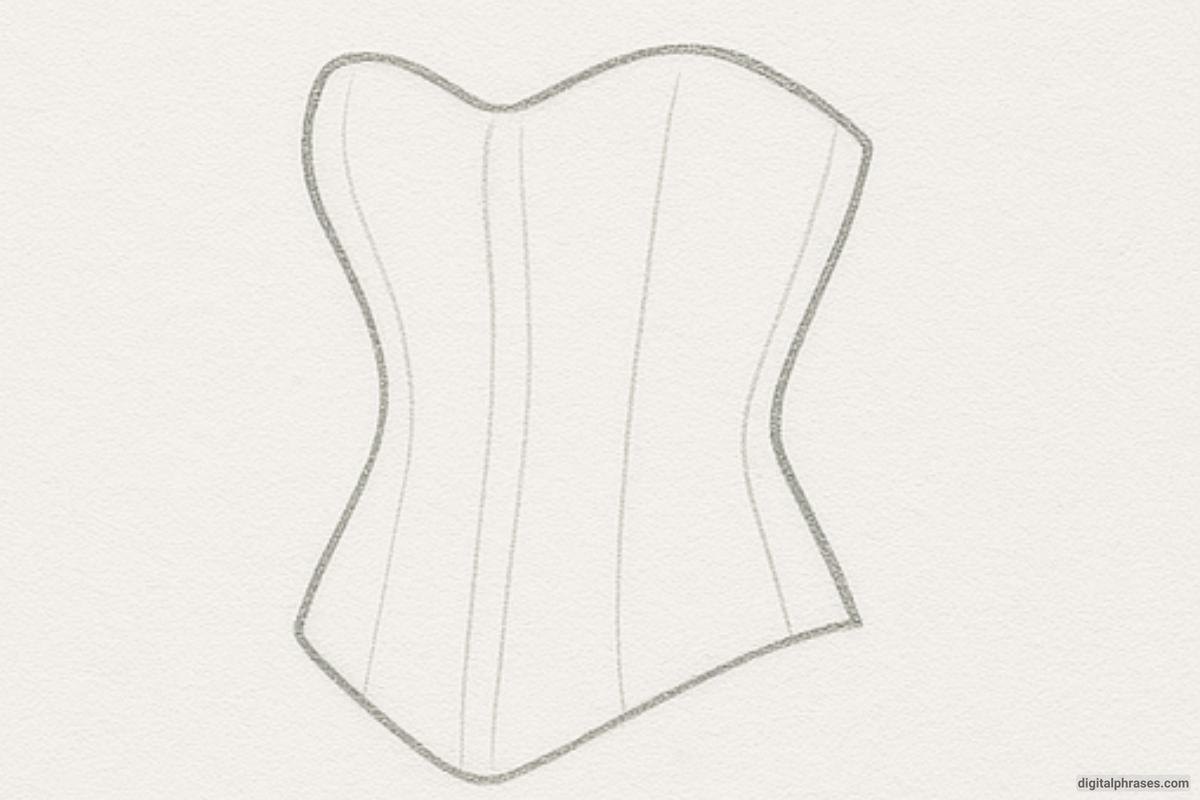
Step 2 – Outline the Corset Shape
- Now, refine the shape of the corset. Draw the upper part with a gentle curve, ensuring it has the classic shape that hugs the body. Add the sides, creating a narrower shape towards the waist and flaring out slightly at the bottom.
- Use smooth, clean lines, following the initial framework but making the form more defined and recognizable as a corset.
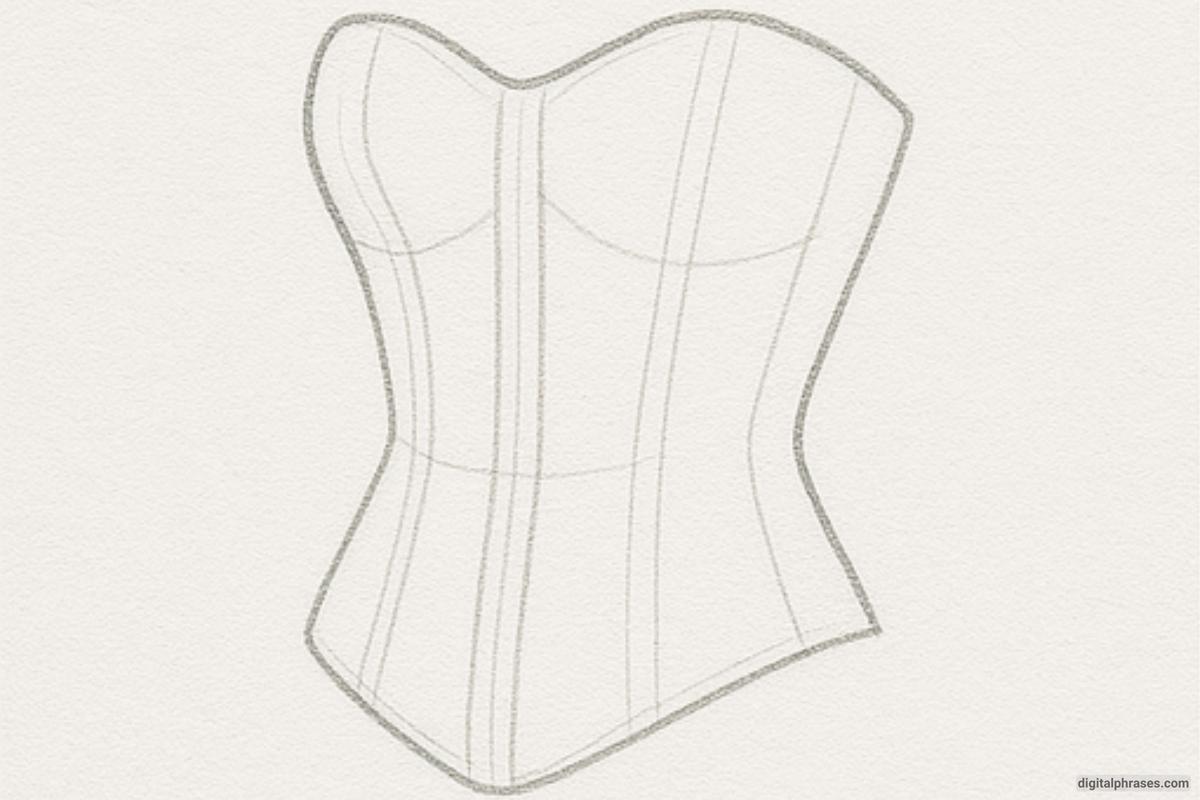
Step 3 – Add Details and Seams
- Begin adding details like the corset’s vertical seams. Draw parallel lines along the corset to represent the boning and structure, which give the corset its shape.
- Add the inner and outer lines of the corset, carefully following the contours of the body. Focus on the detailed curves and any other structural features that make the corset look realistic.
Step 4 – Final Shading and Finishing Touches
- Now, apply shading to enhance depth and texture. Darken areas where shadows would naturally fall, such as the curves of the corset and along the seams. Use light, delicate shading to give a sense of the material’s texture and structure.
- Add final touches like the laces at the bottom of the corset, ensuring the ribbons appear realistic by giving them fluid, curved lines to convey their flexibility.
