How To Draw a Godzilla
Here’s a simple tutorial on drawing a Godzilla.
Step-by-Step Guide to Drawing a Godzilla
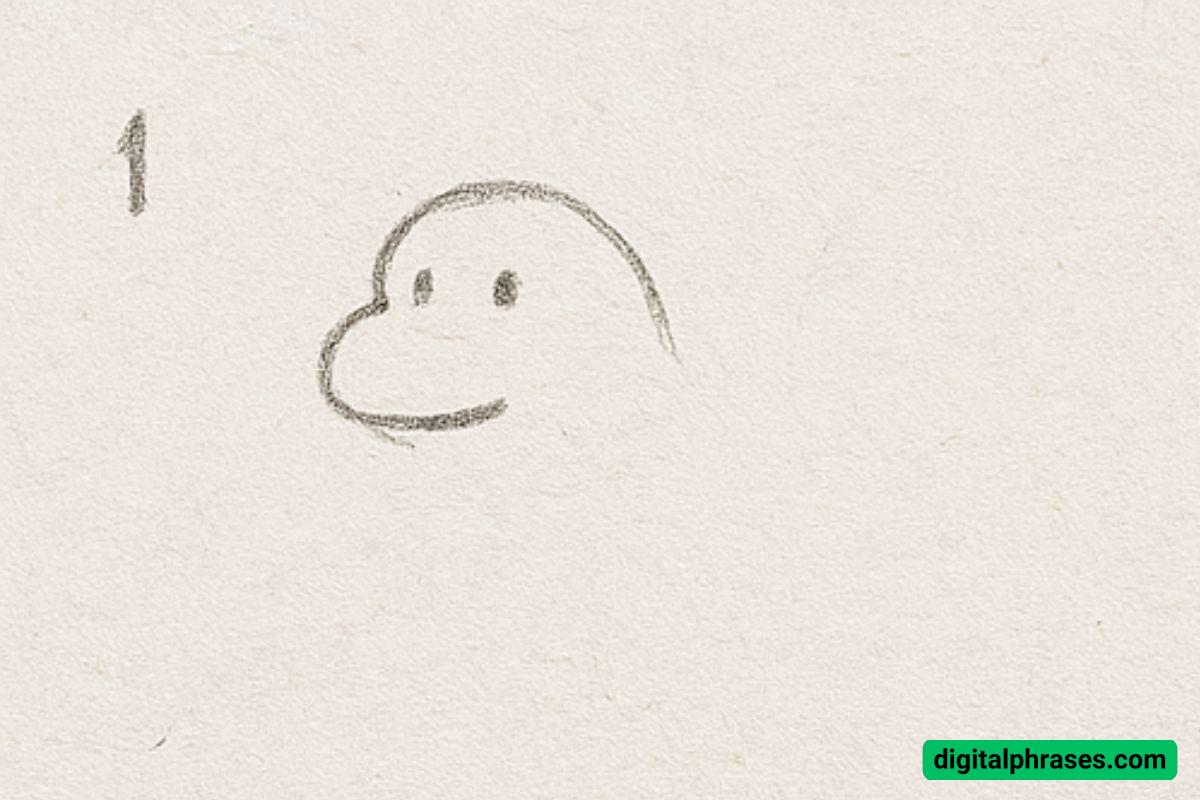
Step 1: Start with the Head
Begin by lightly sketching the head. You’ll want to create a rounded, bean-shaped snout that curves upward to form the top of the head.
Add two small vertical dots for the eyes and a soft curve underneath for the mouth. This is just the basic facial structure — keep it simple and smooth at this stage.
Step 2: Add the Body
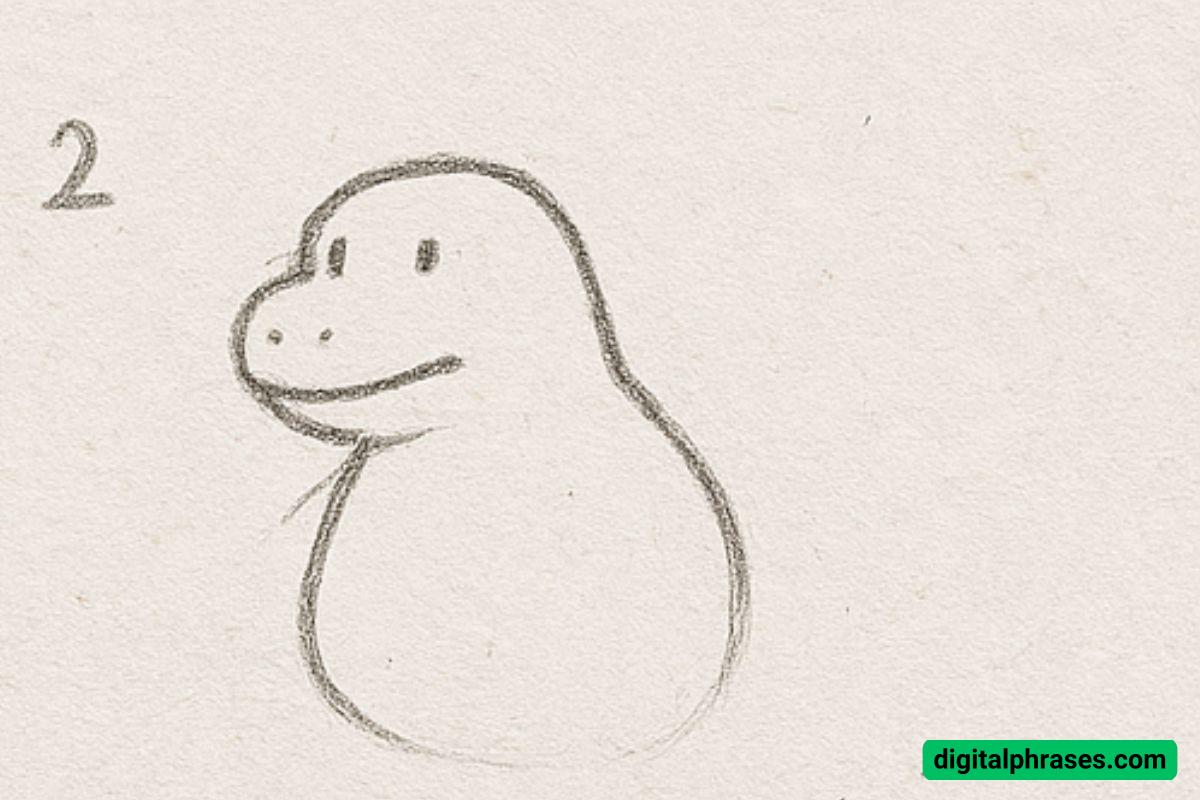
From the head, extend a rounded, pear-shaped form downwards to build the torso. This body should be much larger than the head, giving your character that classic Godzilla silhouette.
The lines should be fluid, and at this point, you’re just establishing the basic form.
Make sure to draw a light guideline down the center of the body if it helps you maintain symmetry.
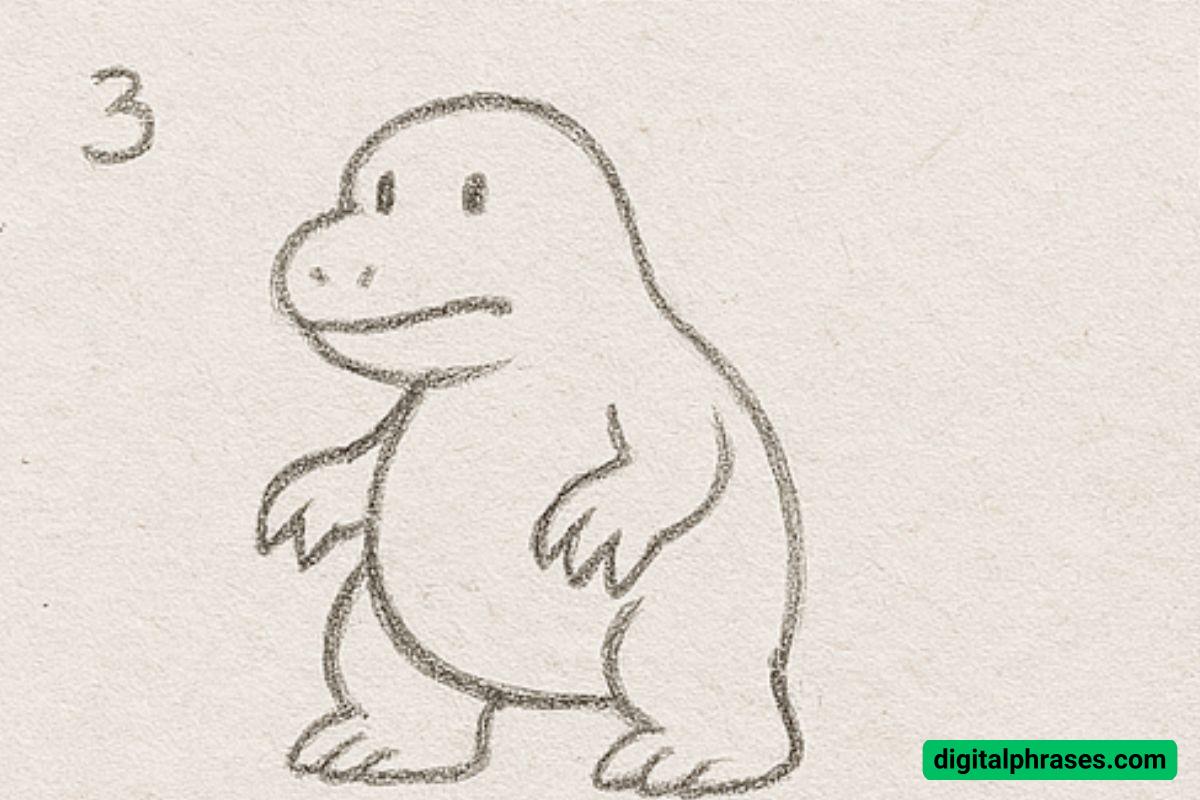
Step 3: Draw the Arms and Legs
Next, we move to adding the limbs. Start with short, slightly curved arms extending from the upper torso — add small fingers or claws at the ends.
For the legs, sketch two thick and slightly bent legs beneath the body. Finish them off with three rounded toes on each foot. These limbs should be chunky, matching the character’s overall sturdy appearance.
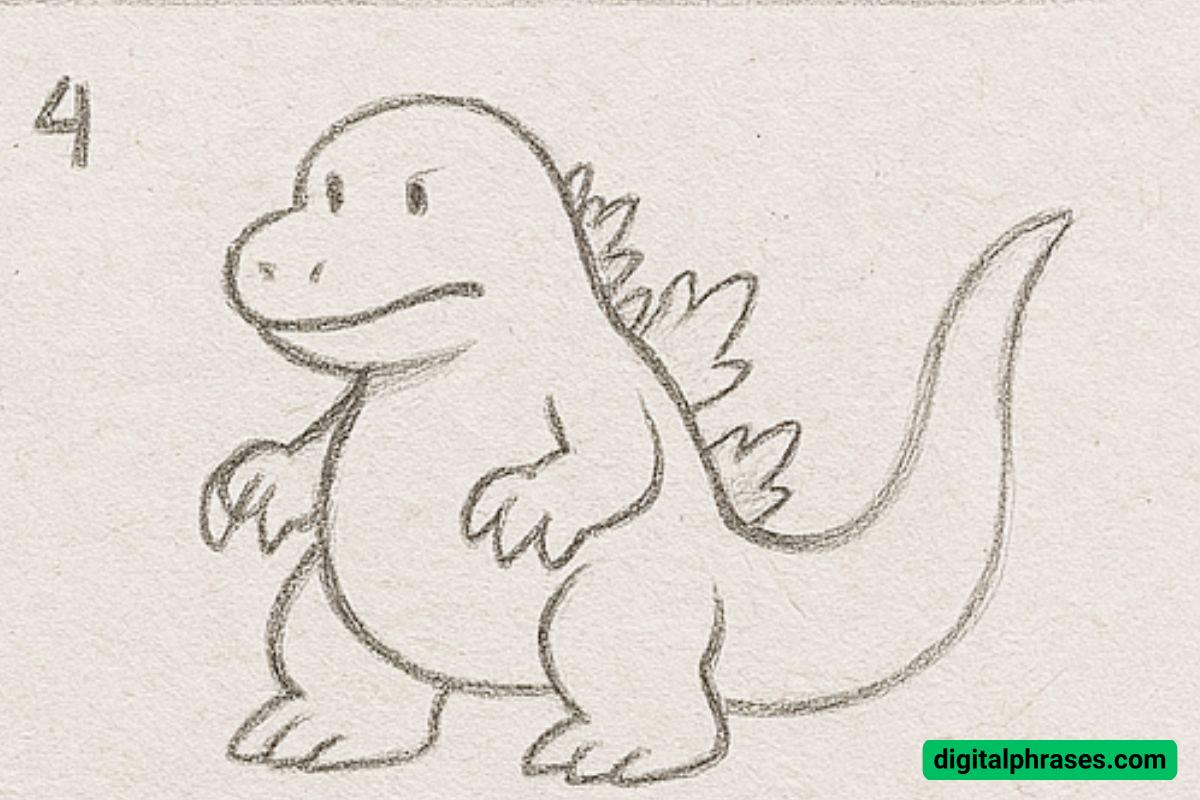
Step 4: Add the Tail and Spikes
Now we bring in Godzilla’s iconic features. From the rear of the body, draw a long, thick tail that curves outward and upwards.
Then, add the spiky dorsal plates along the back. Start just behind the head and continue down to the tail.
These plates should vary in size — generally bigger in the middle and smaller toward the ends. Give them jagged, flame-like edges to capture that classic Godzilla feel.
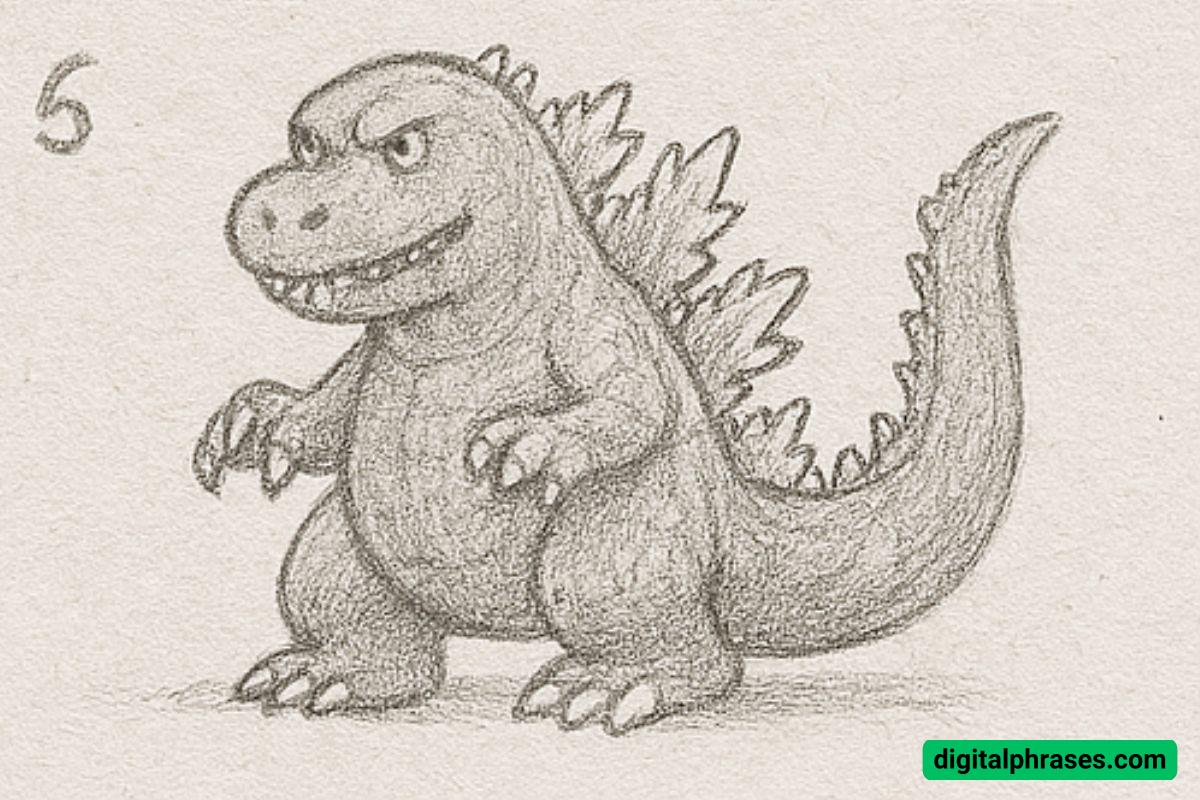
Step 5: Final Details and Shading
Finally, refine your drawing by sharpening the outline and enhancing the features.
Define the mouth with a slight snarl, draw more expressive eyes, and add teeth inside the mouth. You can also introduce some texturing to the skin by adding light shading and small scale-like patterns.
Use a darker pencil or go over your lines to give the drawing more weight and contrast. Add shading under the limbs and tail to give the creature a sense of volume and depth.
List of Equipment Needed
To recreate the drawing shown in the guide, you’ll need:
- Pencils (Various Grades)
- HB or 2B for initial sketching
- 4B or 6B for darker outlines and shading
- HB or 2B for initial sketching
- Eraser
- A soft eraser for removing guidelines and refining details
- A soft eraser for removing guidelines and refining details
- Sketch Paper or Drawing Pad
- Medium to smooth texture for clean pencil strokes
- Medium to smooth texture for clean pencil strokes
- Blending Tool (Optional)
- A blending stump or tissue for smoother shading effects
- A blending stump or tissue for smoother shading effects
- Pencil Sharpener
- Essential for maintaining clean, precise lines
- Essential for maintaining clean, precise lines
- Ruler (Optional)
- For drawing a center guideline or aligning proportions if needed

