How to Draw a Realistic Human Head – Step-by-Step Guide
Here’s a simple guide on how to draw a human head.
How to Draw a Realistic Human Head – Step-by-Step Guide
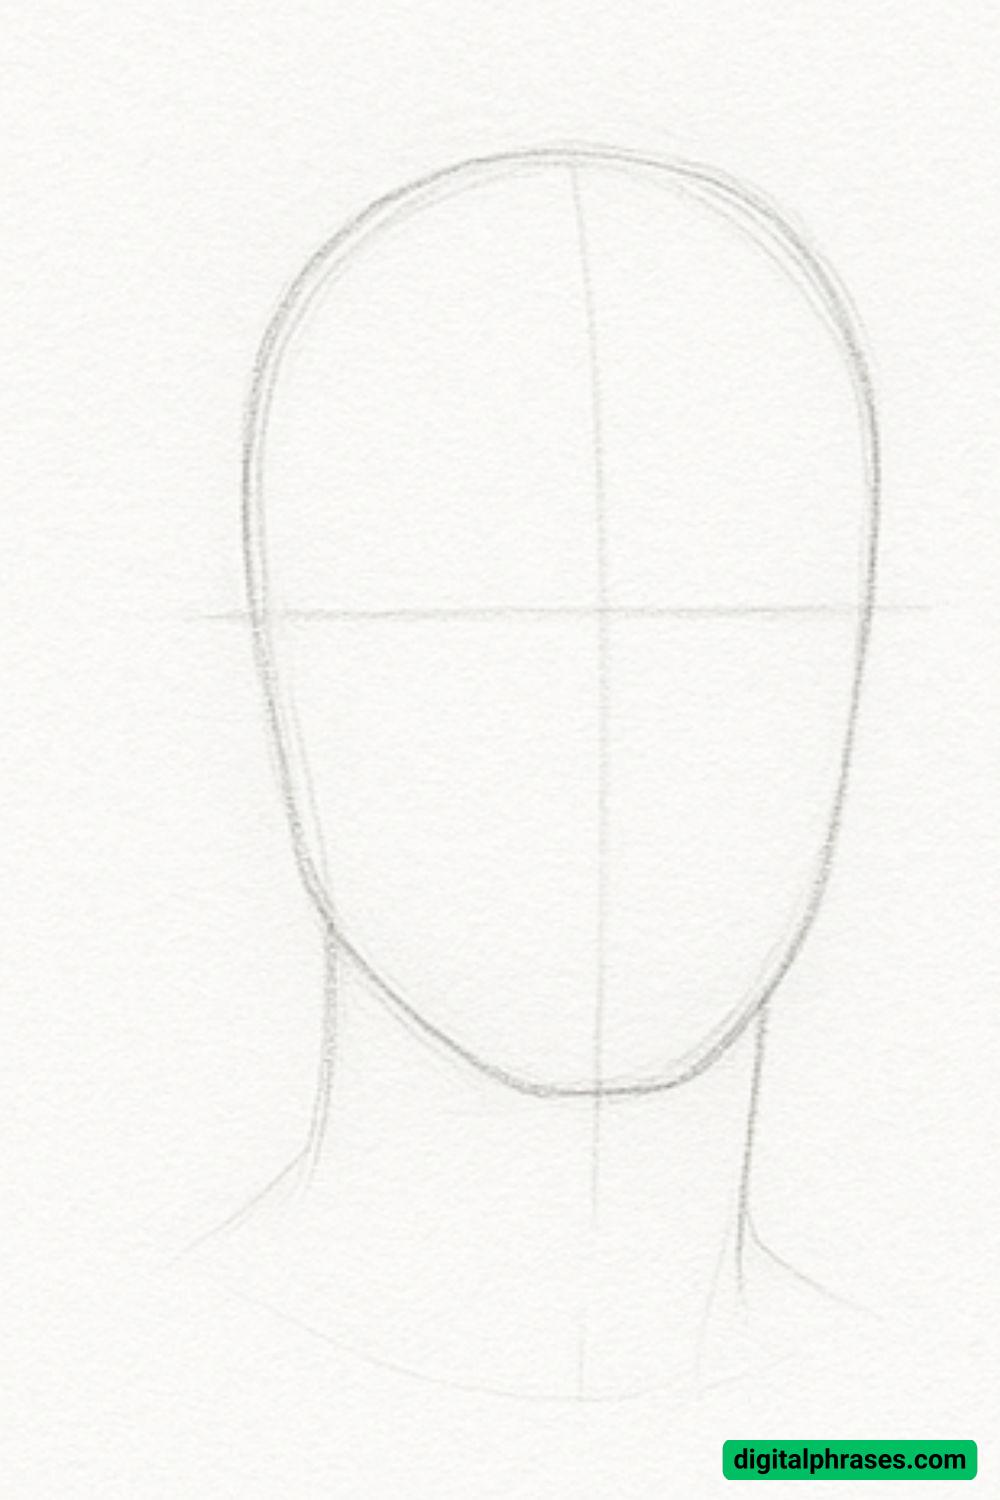
Step 1: Construct the Head Shape and Guidelines
To begin, draw a clean oval shape—this represents the basic shape of the human head. It’s okay if it’s not perfect; just keep your lines light.
Then, divide this oval vertically and horizontally using two light guidelines. The vertical line helps with symmetry, and the horizontal line marks the eye level.
From the bottom of the oval, gently sketch a jawline that tapers into the chin. Add a neck extending from the base of the head with a slight flare toward the shoulders.
These guidelines are essential to maintain correct proportions later on.
Step 2: Outline Facial Features
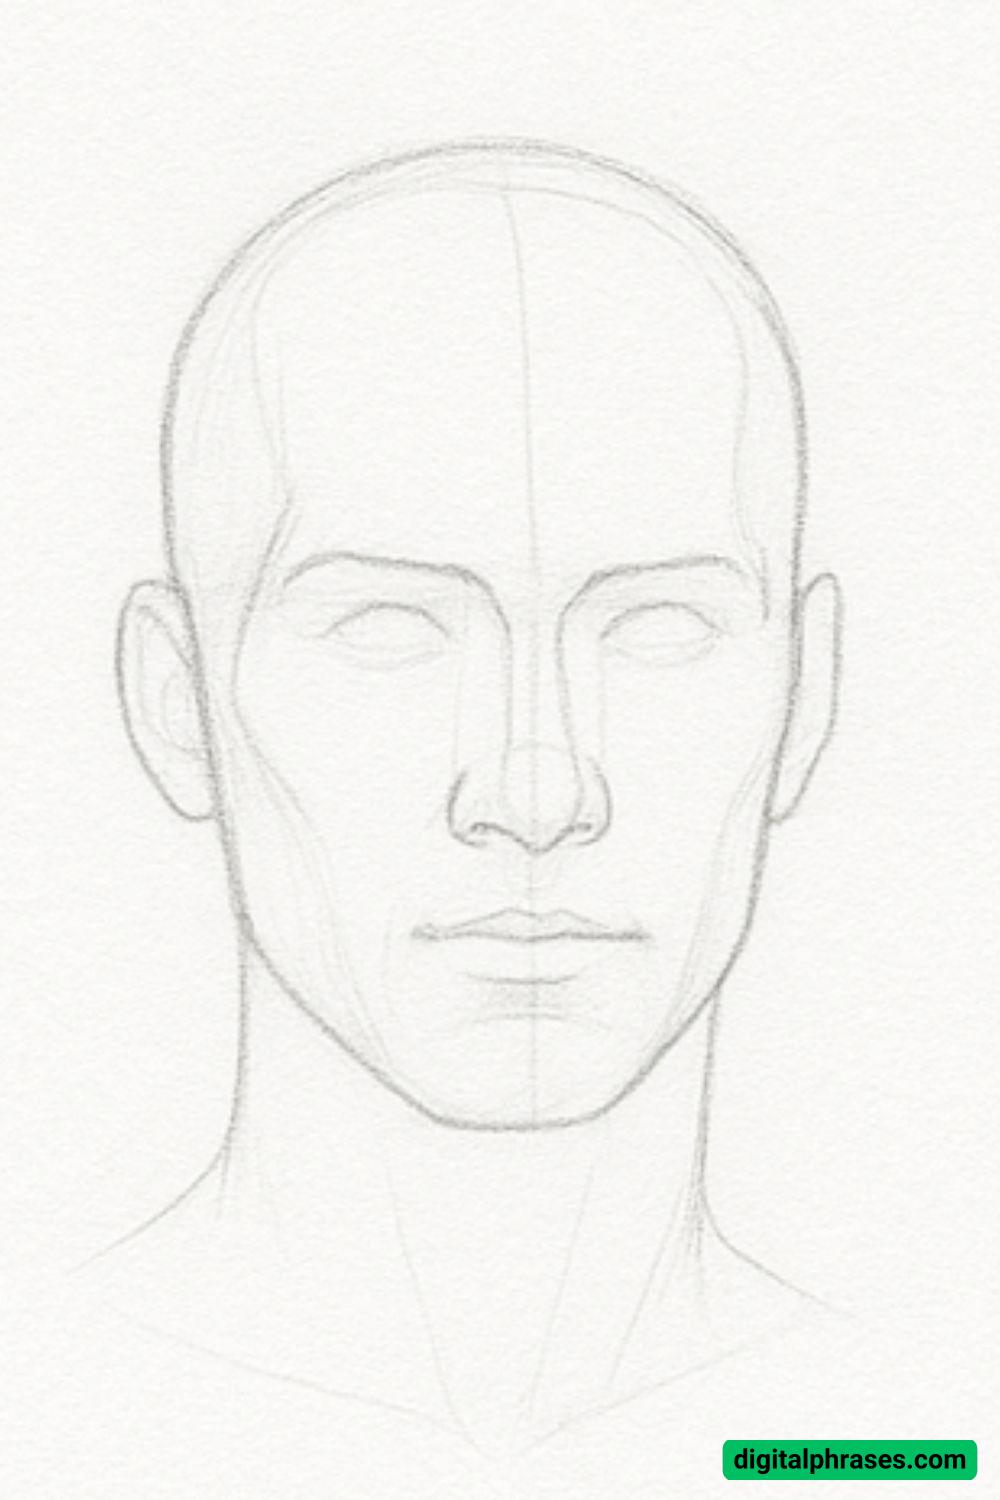
With the basic structure in place, start mapping out the facial features. Begin with the eyes—they should be placed along the horizontal guideline.
Make sure there’s one eye’s width of space between them. Next, block in the nose, using the vertical guideline as your center.
The bottom of the nose usually aligns halfway between the eye line and the chin. Then sketch the mouth, positioning it about a third of the way between the nose and the chin.
Draw the ears between the eye line and the base of the nose. At this stage, the features should be shaped, but not overly detailed.
Step 3: Refine the Features and Add Detail
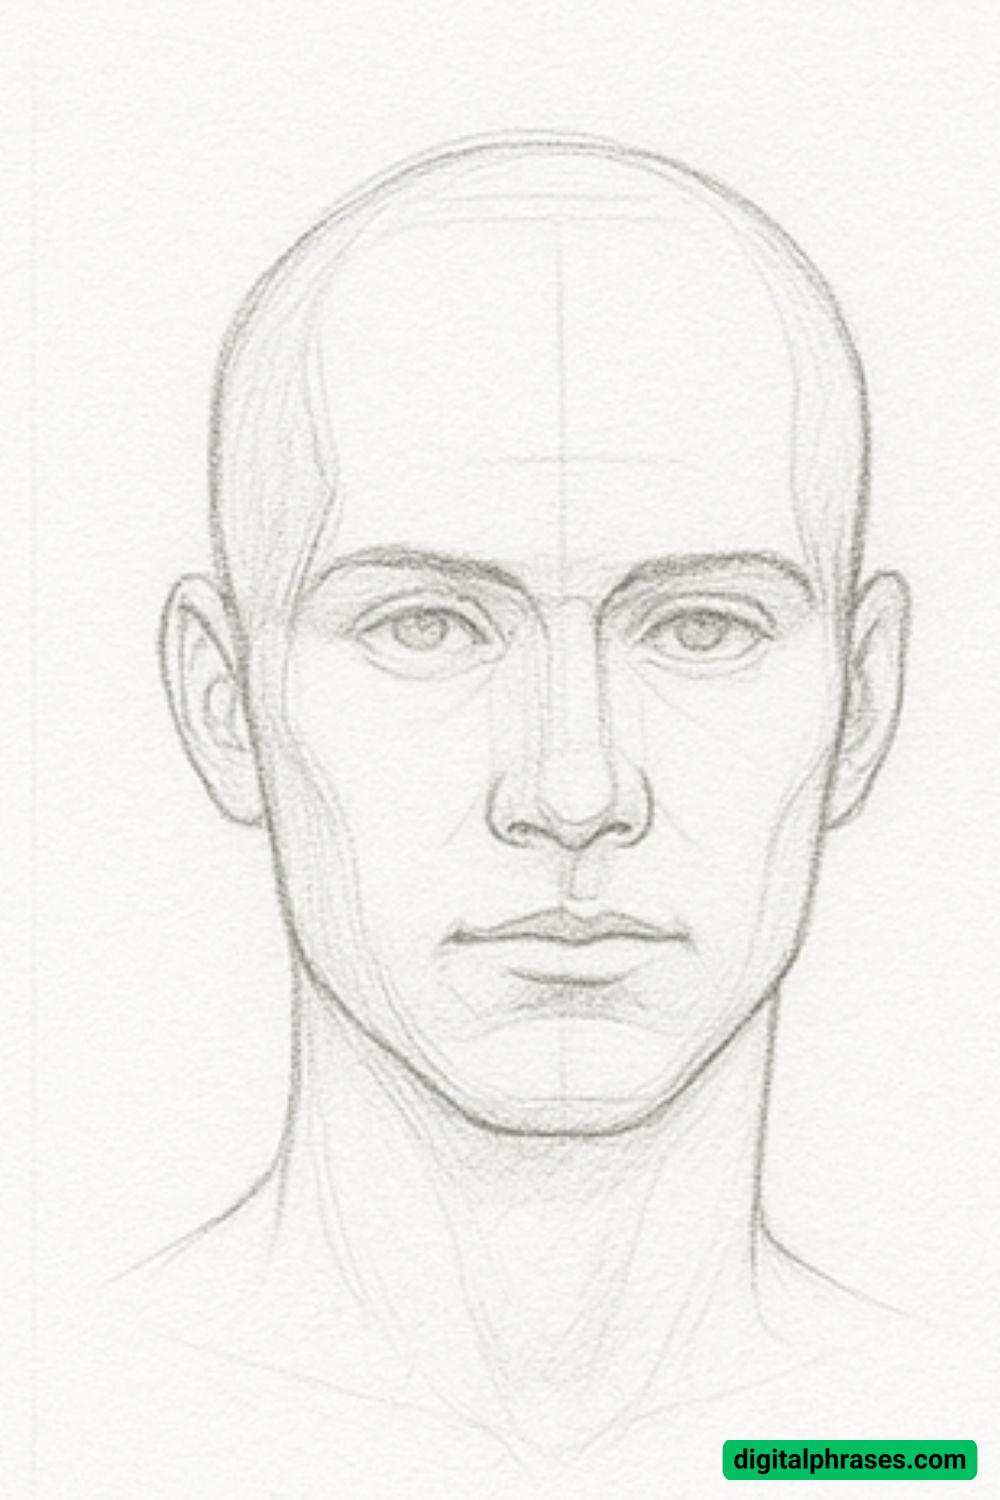
Now it’s time to go in and refine everything. Sharpen the lines of the eyes, add eyelids, and define the irises and pupils.
Add structure to the nose by sketching the nostrils and the bridge. Refine the shape of the lips, defining the upper and lower lips carefully.
Shape the ears, showing the curves and inner contours. Define the jawline and cheekbones to reflect the form of the face.
This is also the time to map in the hairline if your character will have hair. Begin shading gently to indicate planes of the face—eye sockets, sides of the nose, under the lips, and around the jaw.
Step 4: Final Shading and Realism
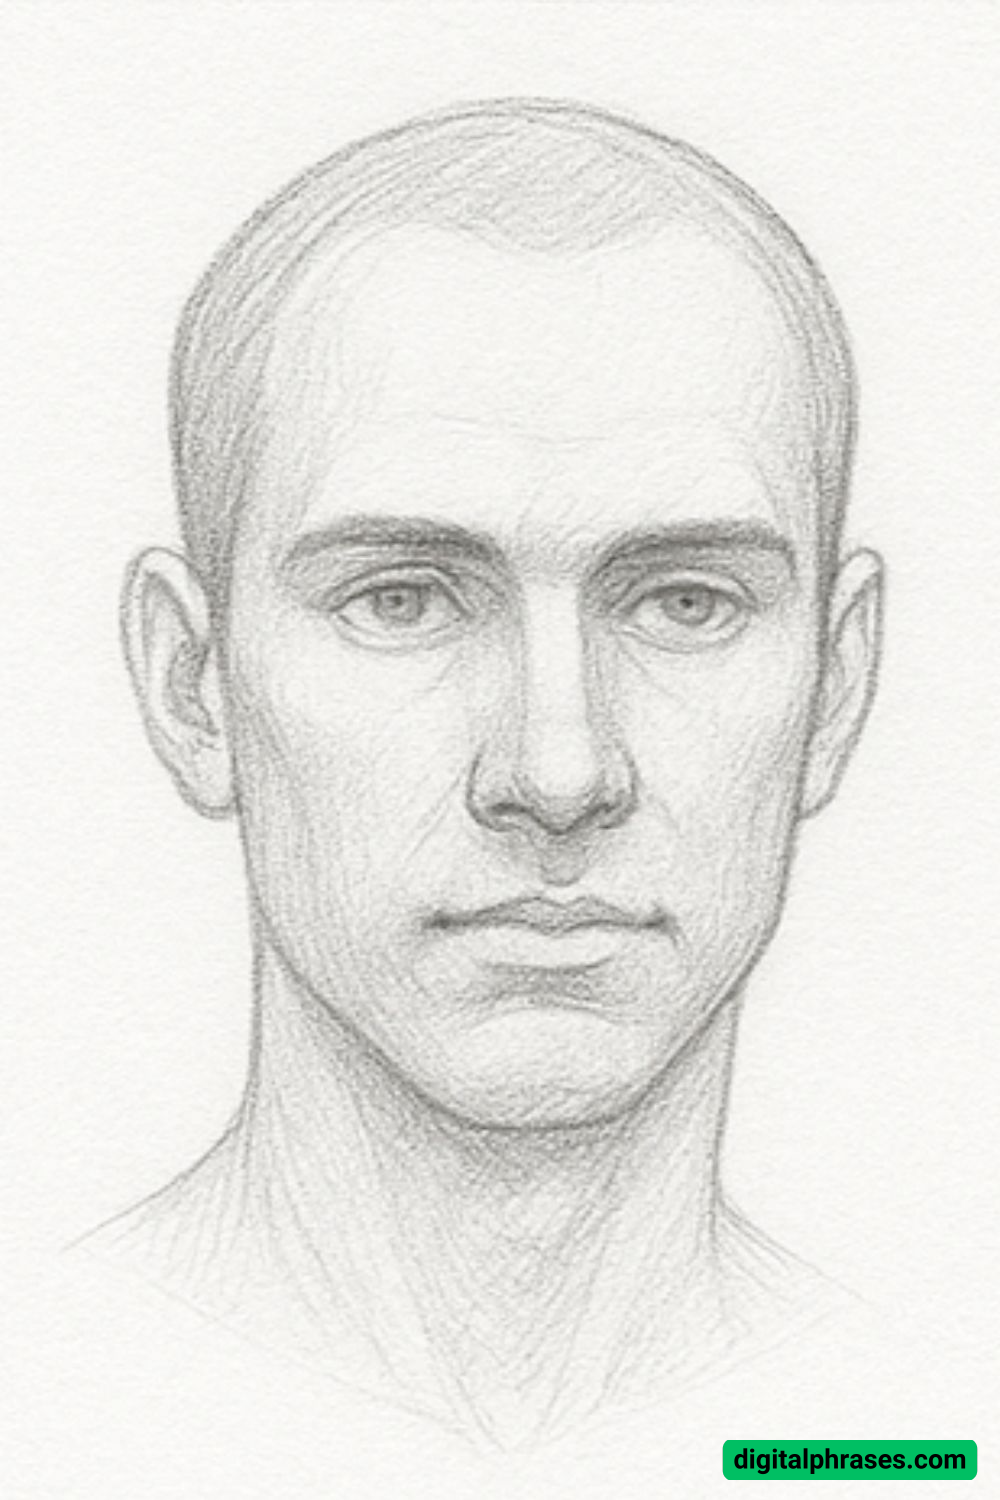
Now that all the anatomy is properly placed, start shading the drawing for realism. Use a soft pencil to shade under the eyebrows, beneath the nose, and under the chin to give the face depth.
Blend where needed using a stump, but be careful to keep some texture to show skin. Add details like pores, fine lines, and texture to the lips.
Refine the eyes to give them life with small highlights. Build the hair using directional strokes.
Focus on light source and contrast to bring the drawing to life. By the end of this step, your sketch should resemble a polished, realistic human head.
List of Equipment Needed
Based on the stages illustrated, here are the tools you’ll need:
- Drawing Paper or Sketchbook – A smooth or slightly textured surface is ideal.
- Graphite Pencils (Various Grades) – Use H or 2H for construction lines, and B, 2B, or 4B for details and shading.
- Eraser – A kneaded eraser is great for subtle corrections and creating highlights.
- Blending Stump or Tortillon – Useful for softening shadows and creating smooth transitions.
- Pencil Sharpener – A sharp tip is crucial for fine details like eyes and hair.
- Ruler (Optional) – Helps with accurate alignment when constructing the head.
- Mirror or Reference Photo – Always helpful to observe real anatomy.

