How to Draw a German Shepherd – Step-by-Step Guide
Here is a simple tutorial on drawing a easy sketch of a German Shepherd.
How to Draw a German Shepherd – Step-by-Step Guide
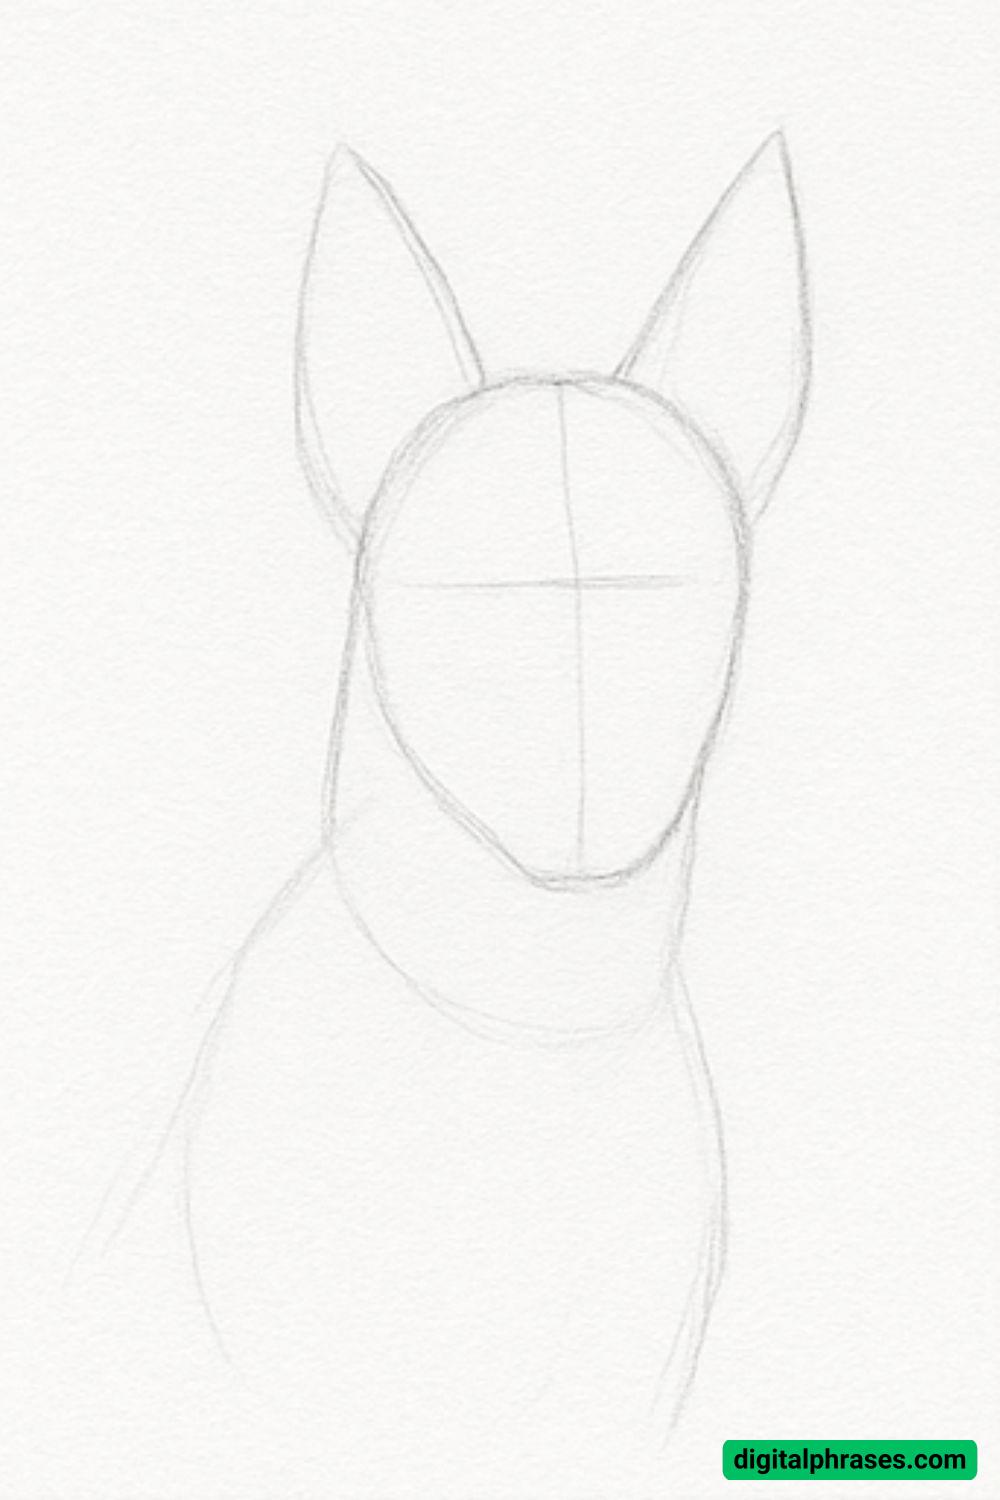
Step 1: Construct the Basic Framework
Begin by sketching the foundational structure of the German Shepherd’s head and upper body. Start with an oval or egg shape for the head. Lightly draw a vertical line down the center of the face and a horizontal line across it.
These guidelines will help place the facial features later. Add two large, upright ears by drawing triangular shapes on top of the head.
Below the head, sketch the neck and part of the shoulder area using simple curves and light lines. Keep everything loose and faint at this stage, focusing only on proportion and placement.
Step 2: Refine the Facial Structure
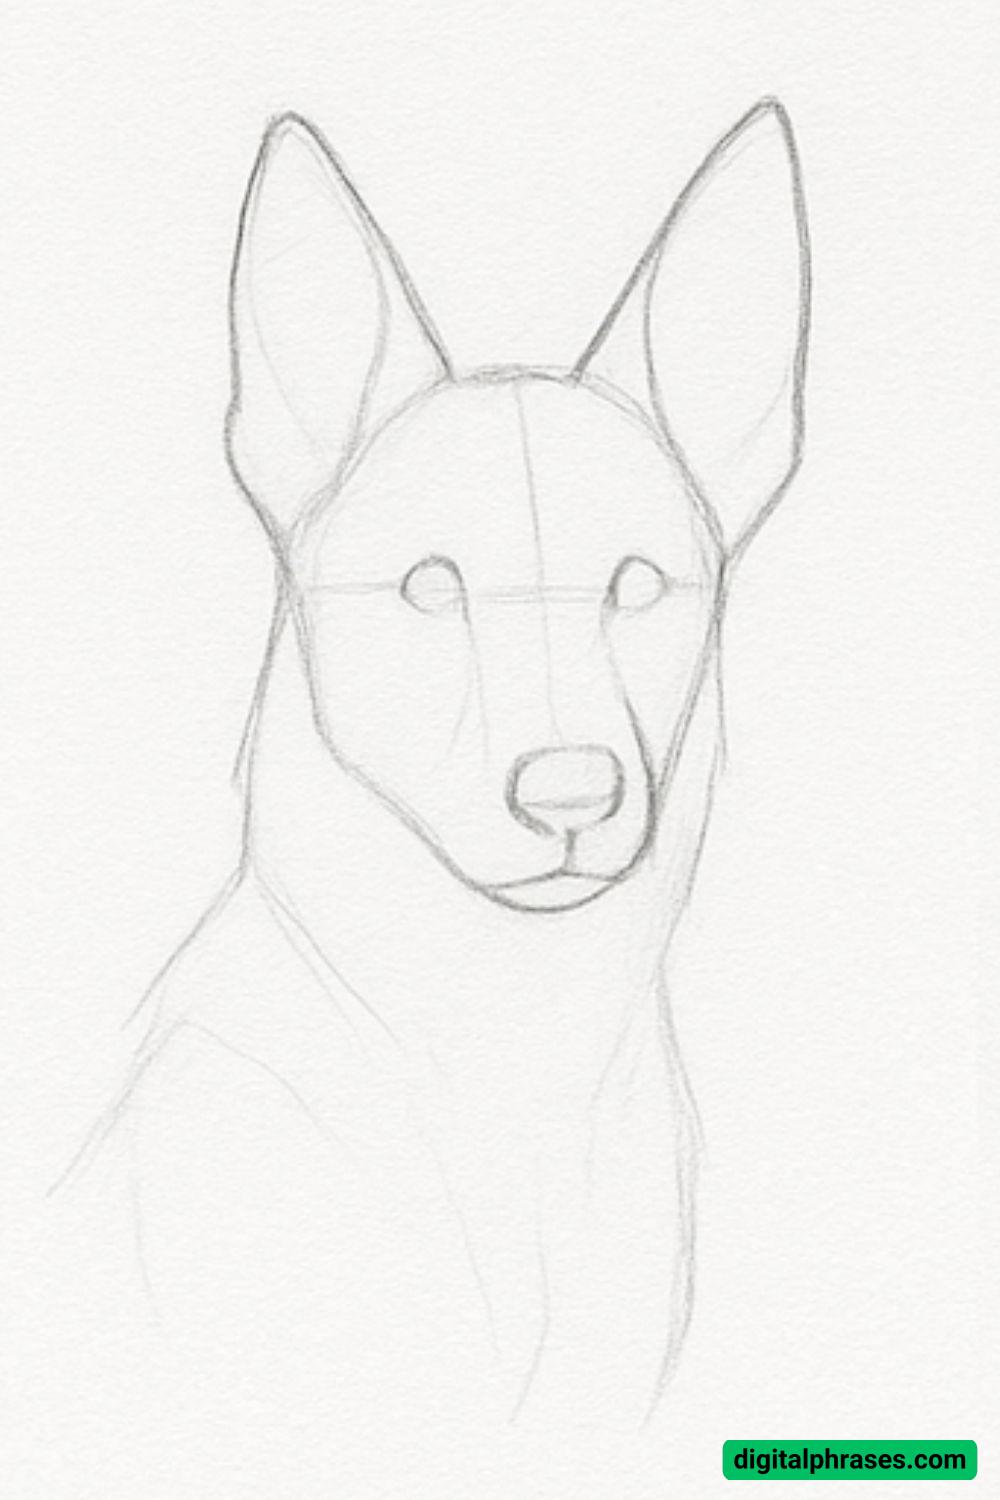
Now that your base is in place, it’s time to refine the head and ears. Define the snout by sketching the muzzle extending from the head shape.
Add an oval for the nose at the tip of the muzzle. Start forming the eyes using almond shapes on either side of the vertical guideline, sitting just above the horizontal line.
Add the jawline and give some shape to the cheek and neck fur outlines. You can begin to refine the ear interiors now as well. This is still a rough draft stage—keep your pencil strokes light and adjustable.
Step 3: Add Details and Begin Shading
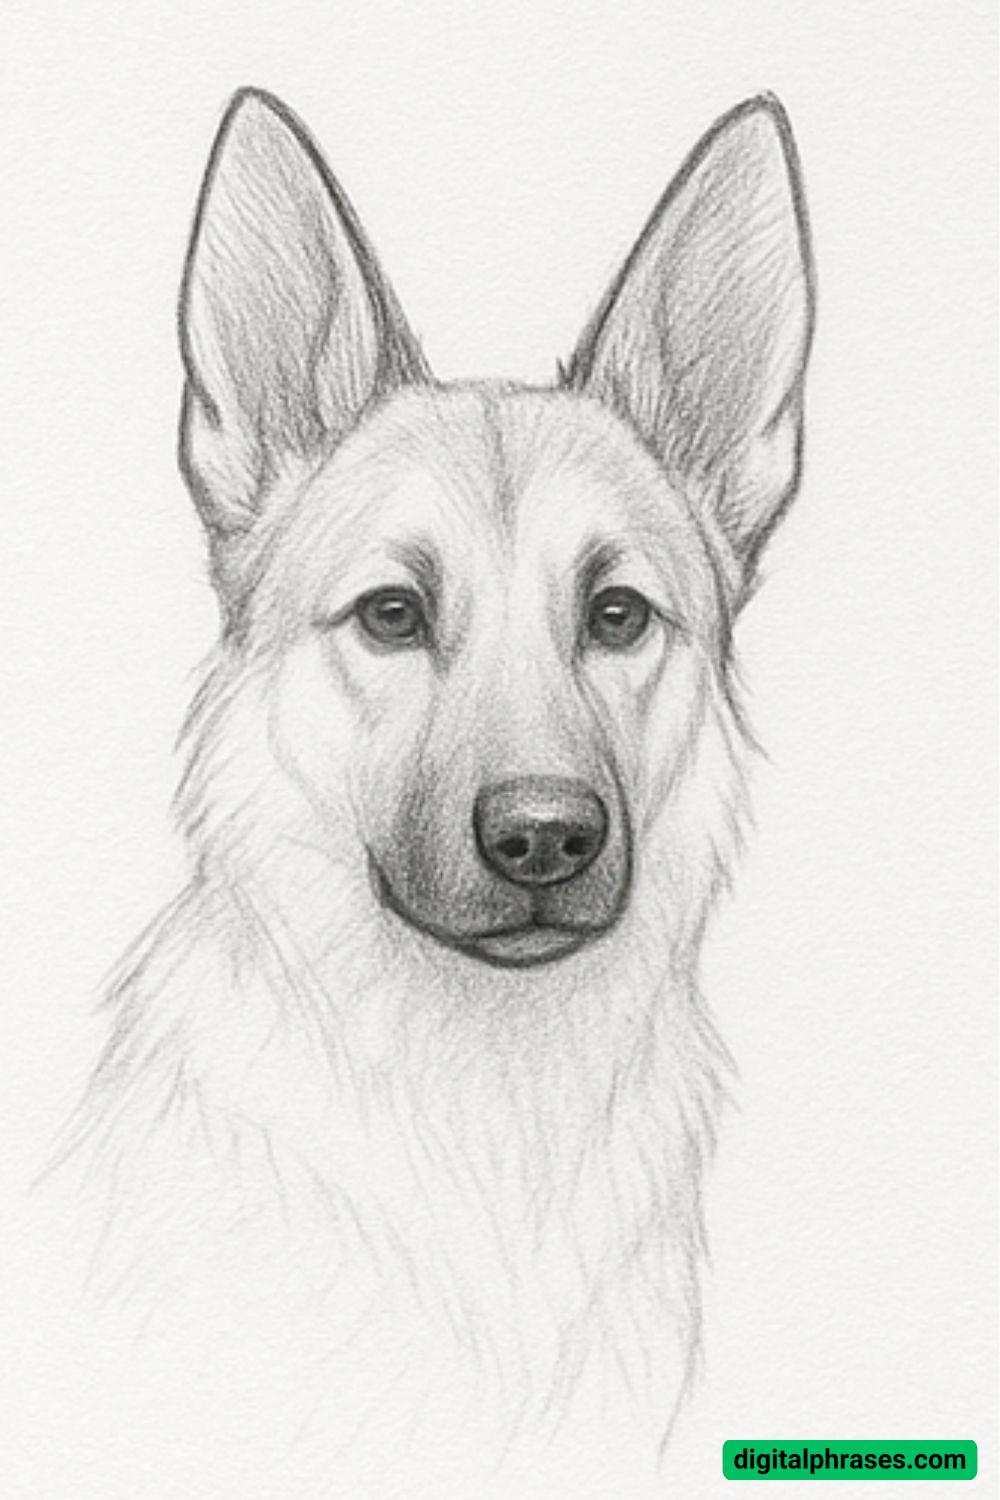
This is where your drawing starts to come alive. Begin refining the details of the face—draw the nostrils and refine the shape of the nose. Outline the eyes more clearly and begin adding pupils.
Start shading the darker areas like the eyes, nose, and ear interiors using small, controlled strokes. Now you can begin suggesting fur texture, especially around the edges of the ears, neck, and cheeks.
Use directional lines that follow the contours of the dog’s fur to add volume. Work gradually from light to dark, building up the shadows to create depth.
Step 4: Final Shading and Texture
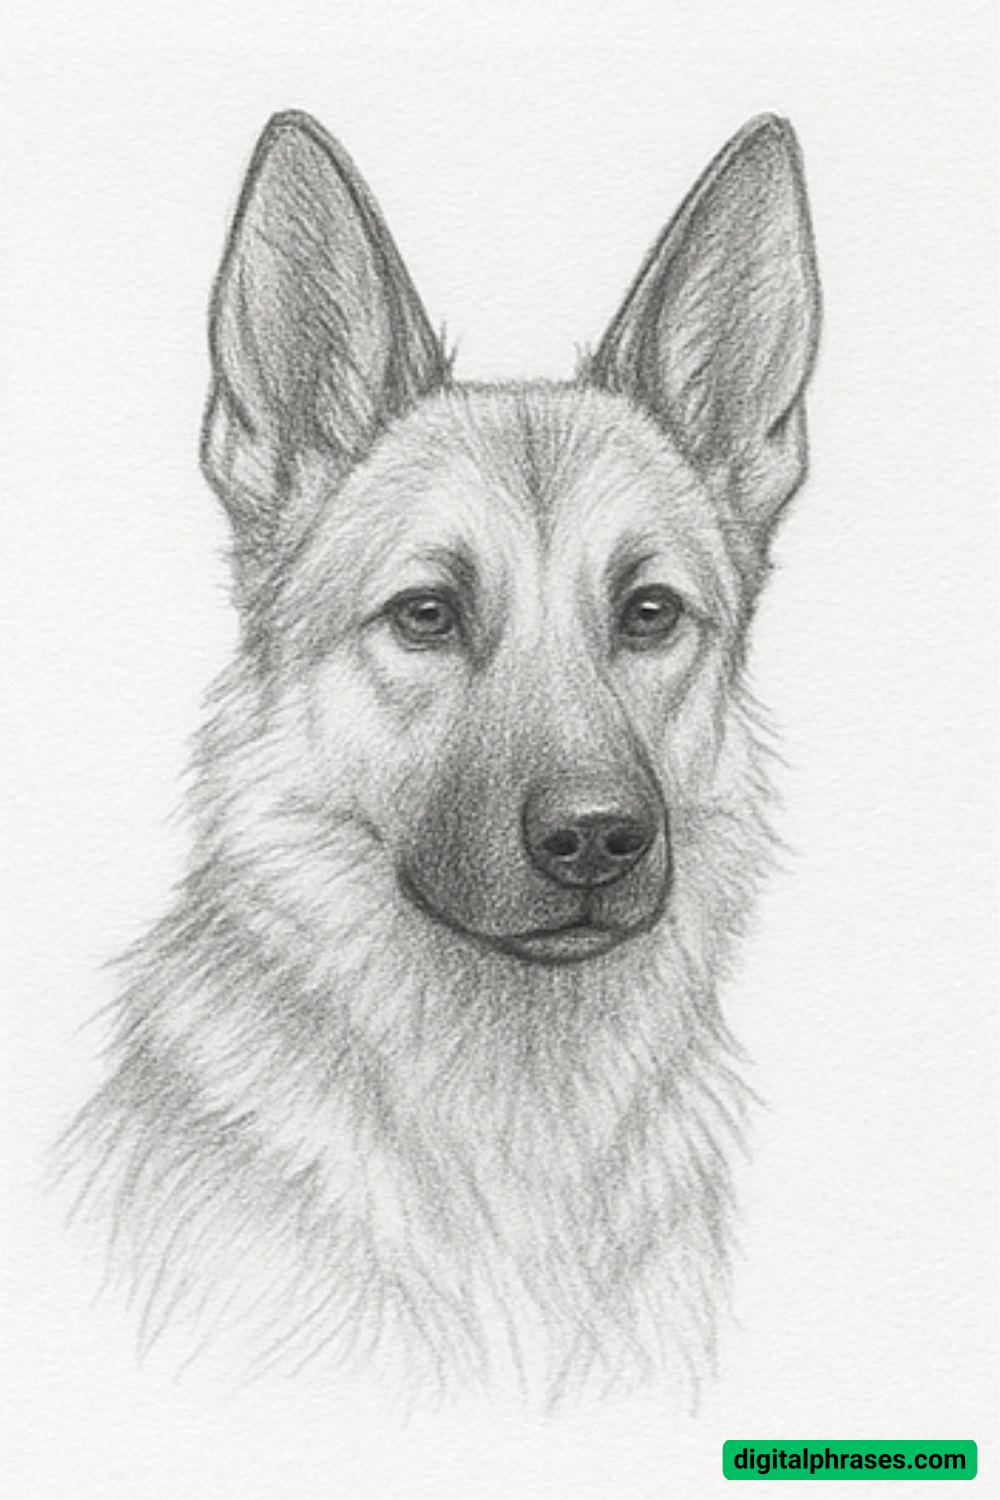
In the final stage, deepen your shading and enhance the realism. Use soft pencil strokes to build rich texture across the dog’s fur. Pay close attention to the areas where the light hits the fur—leave those slightly lighter.
Focus on the natural variation in fur length and direction, particularly around the muzzle, neck, and forehead. Refine the eyes to give them life and a slight shine, which adds to the realism.
Blend certain areas gently with a blending stump if needed, but preserve the fur texture. Finish with any small highlights using an eraser or a white gel pen.
List of Equipment Needed:
Based on the drawing stages shown in the image, here’s a list of the essential tools you’ll need:
- Sketchbook or Drawing Paper – Medium to smooth surface ideal for detailed pencil work.
- Graphite Pencils (Various Grades) – Ranging from hard (H, 2H) for sketching, to soft (B, 2B, 4B, 6B) for shading and detailing.
- Eraser – A kneaded eraser is great for lightening lines and creating highlights in the fur.
- Blending Stump or Tortillon – For smooth shading and softening pencil marks.
- Pencil Sharpener – Always keep your pencils sharp for clean lines and detailed textures.
- Ruler (Optional) – For helping keep proportions aligned during the construction phase.


