How To Draw a Fish
Here’s a simple and straight-forward method of drawing a fish.
Step-by-Step Instructions to Draw a Fish
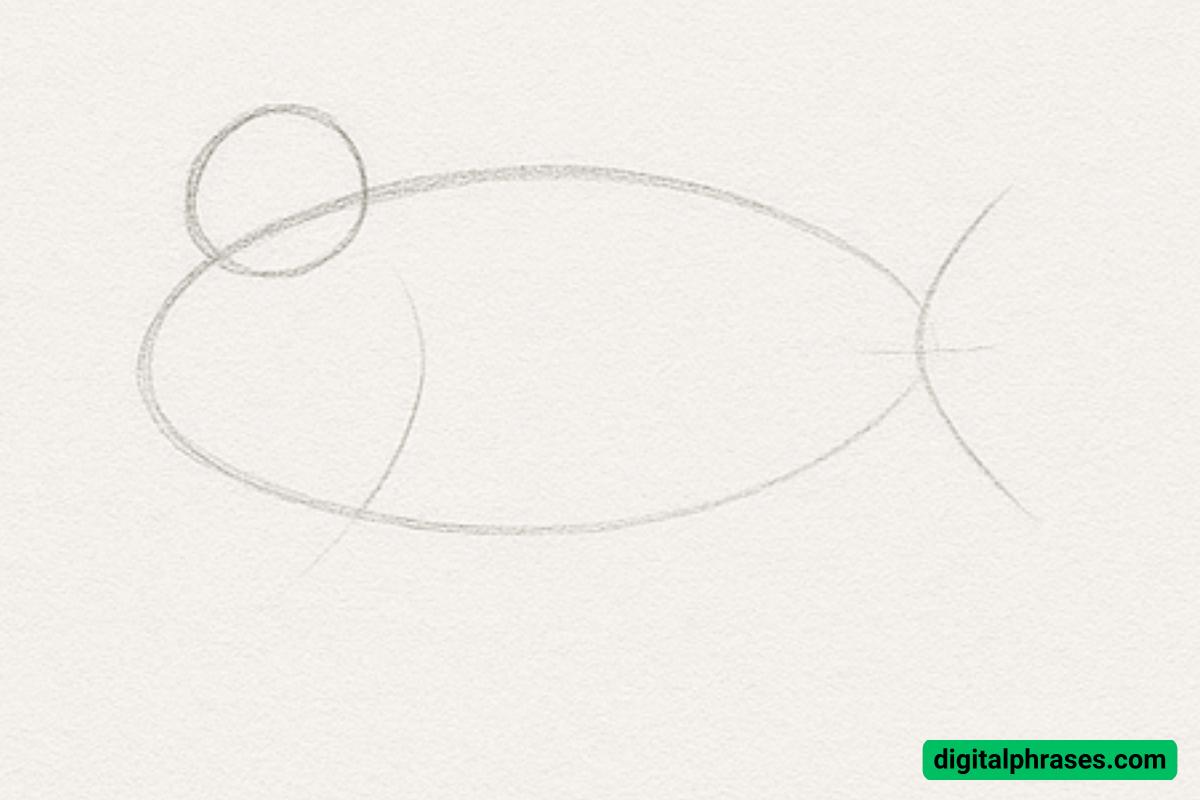
Step 1: Draw the Basic Shapes
In the first step, you begin by drawing the basic outline of the fish using simple shapes. Start by drawing an oval or egg-like shape for the body of the fish. This will be the main shape for the fish’s body.
On the left side of the oval, draw a small circle to represent the fish’s head.
Make sure the circle is proportionate to the body; it doesn’t need to be perfect at this point, as you’ll refine it later. Connect the circle to the oval with two gentle lines that form the neck area. This creates the basic framework for your fish.

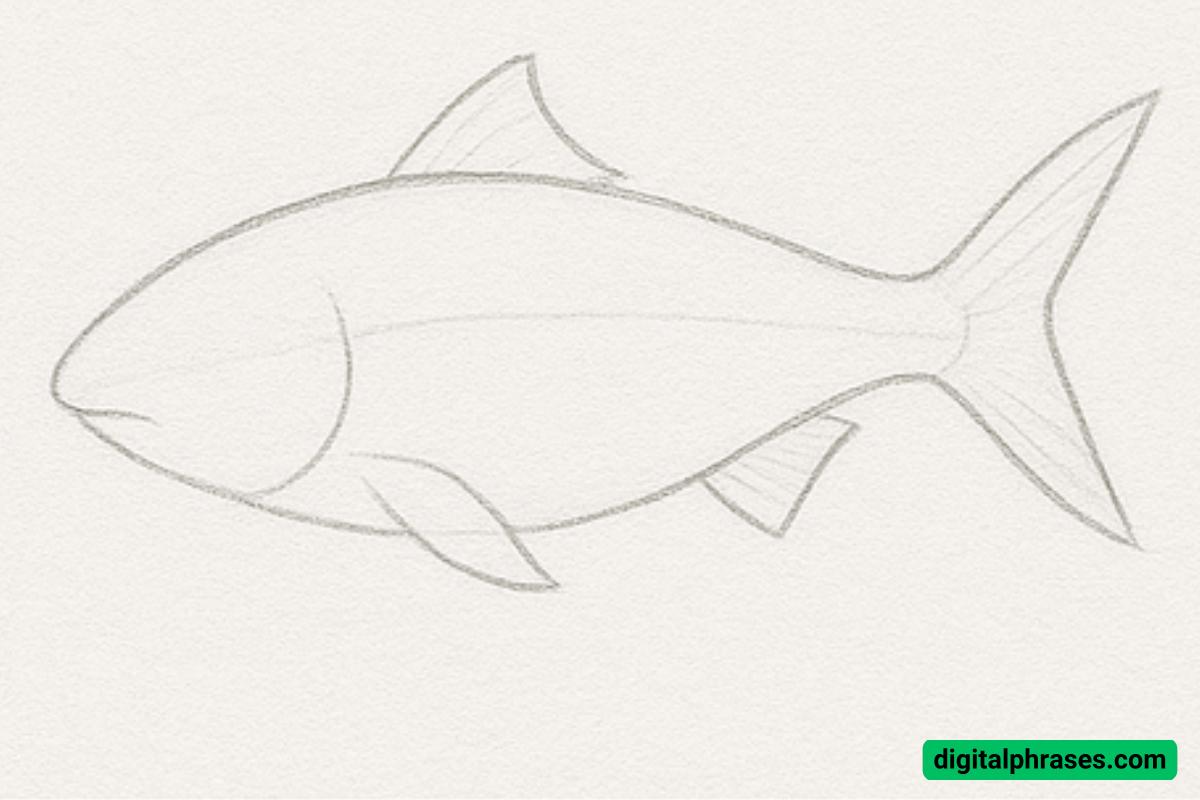
Step 2: Refine the Body Shape
Now that you have the basic shapes in place, start refining the outline of the fish’s body. Smooth the transition between the oval and the circle, making the body of the fish flow naturally.
At the back of the oval, draw the tail fin by creating a wide “V” shape that points outward.
Ensure that the body of the fish gradually narrows toward the tail to give it a more streamlined look, as this is characteristic of most fish.
You’ll also want to smooth out the top and bottom edges of the fish’s body to ensure it looks natural.

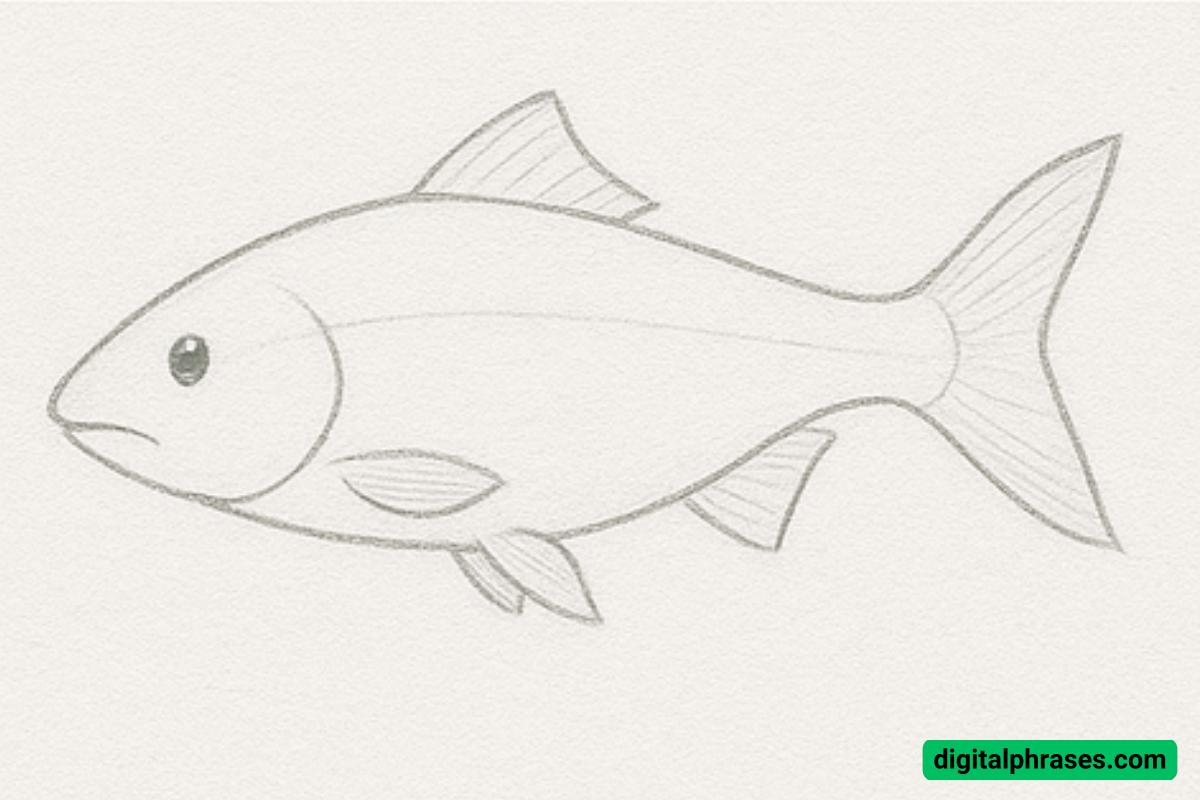
Step 3: Add the Fins and Facial Features
In this step, we’ll add more details to the fish to make it look more realistic. Begin by drawing the dorsal fin (the fin on the top of the fish) roughly halfway along the length of the body.
The dorsal fin should be triangular in shape, curving gently. Then, draw the pelvic fins (the smaller fins) near the bottom of the fish, just behind the head.
You can shape these fins like soft triangles or curved shapes, depending on the fish you are drawing.
Next, focus on the face.
Draw a small curved line near the front of the circle to create the fish’s mouth. Add a small circular eye just behind the mouth. You can also draw a subtle line at the back of the fish’s head to indicate where the gills would be.

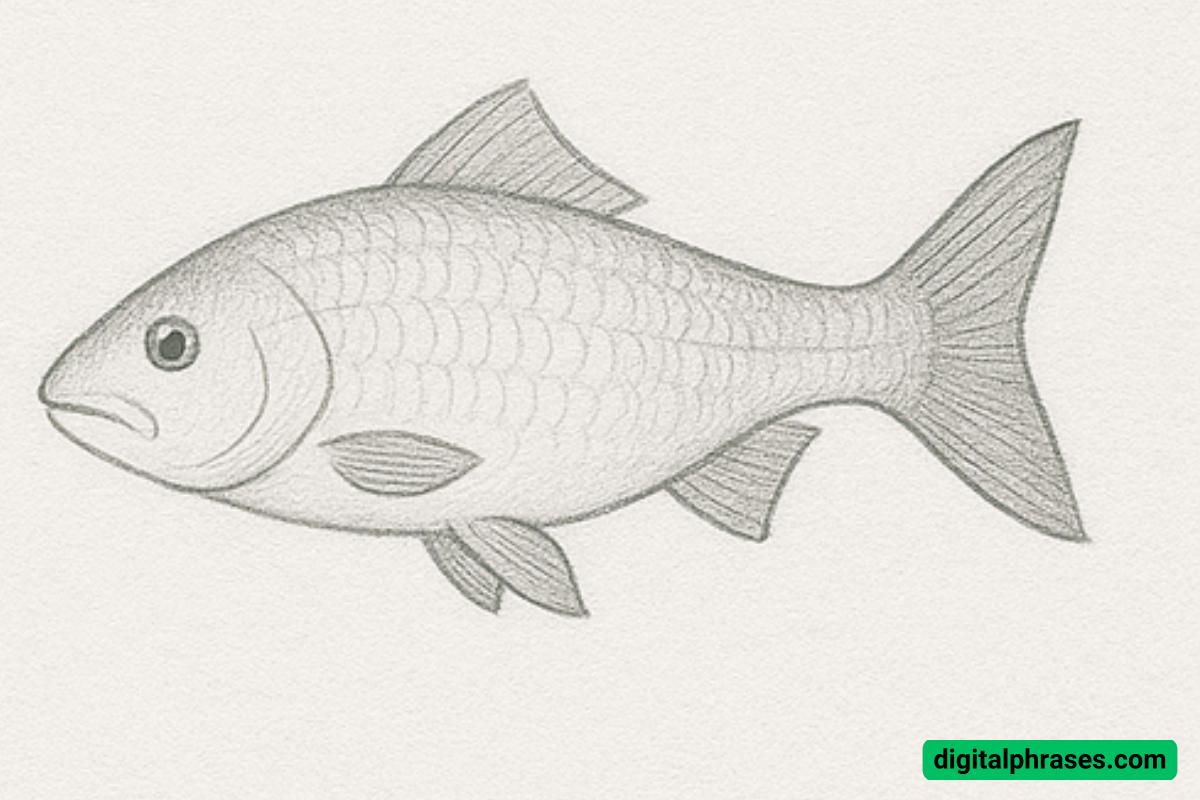
Step 4: Add Scales, Details, and Shading
Now that you’ve added the fins and facial features, it’s time to add more texture and detail. To make the fish look more realistic, draw overlapping curved lines across the body of the fish to represent the scales.
These lines should be small and evenly spaced, curving with the body to follow its shape. Start at the head and work your way down the body, getting progressively larger as you go toward the tail.
Finally, add some shading to bring the drawing to life. You can lightly shade the underside of the fish’s body and beneath the fins to create depth. Use a gentle gradient, gradually darkening the areas where shadows would naturally fall. This gives your fish a more three-dimensional appearance and adds realism to the drawing.

Equipment Needed:
Here’s a list of essential tools you’ll need to complete this fish drawing:
- Pencil – A standard pencil (such as HB or 2B) for sketching the basic outline and details.
- Eraser – A soft eraser to clean up any mistakes and adjust lines.
- Paper – A smooth drawing or sketching paper is best for clean lines and easy shading.
- Ruler (Optional) – If you want precise shapes for the fins or body, you can use a ruler to guide your lines.
- Blending Stump or Tissues (Optional) – For blending shading and creating smooth gradients on the body of the fish.
- Colored Pencils (Optional) – If you want to add color to the fish, colored pencils will help bring it to life. You could color the body with shades of silver, blue, or any fish colors you prefer.


