How To Draw a Man in a Suit?
Here are the simple and easy steps.
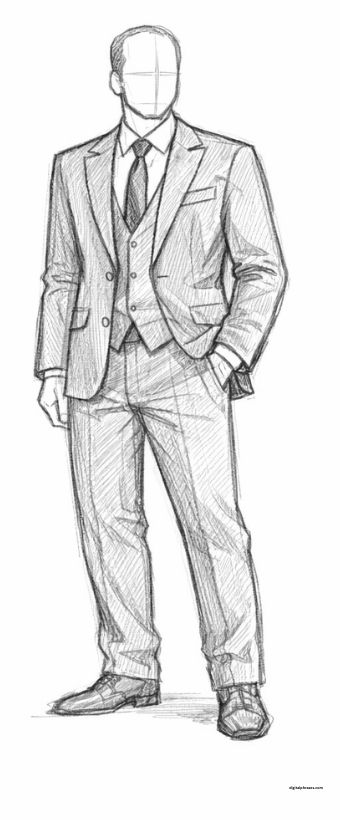
Step 1 – Build the Figure and Pose (Foundation Sketch)
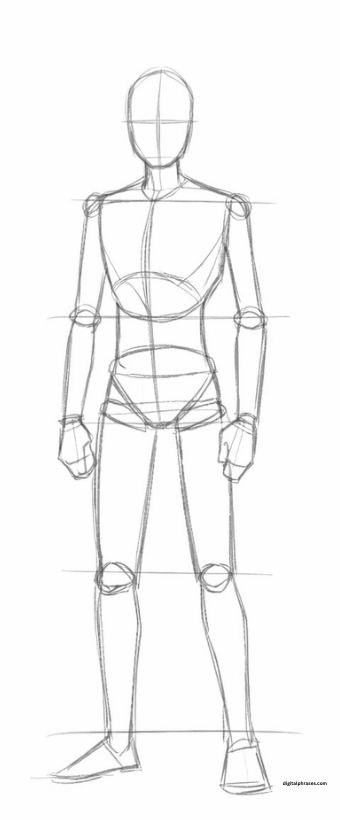
- Start with a simple stick figure to decide the pose (standing straight, walking, hand in pocket, etc.). A suit looks best when the posture is confident and balanced, so keep the spine straight and shoulders slightly back.
- Add basic body shapes over the stick figure: an oval for the ribcage, a smaller oval for the pelvis, and cylinders for arms and legs. This “mannequin” structure helps you place the suit correctly without guessing.
- Mark key suit landmarks lightly: the shoulder line, chest line, waist, and hip line. These guides will control where the jacket tapers, where the buttons sit, and where the trousers begin.
- Keep everything sketchy and light at this stage. You’re not drawing fabric yet—you’re creating a clean map so the suit won’t look lopsided or strangely proportioned later.
Step 2 – Outline the Jacket Shape (Silhouette and Fit)
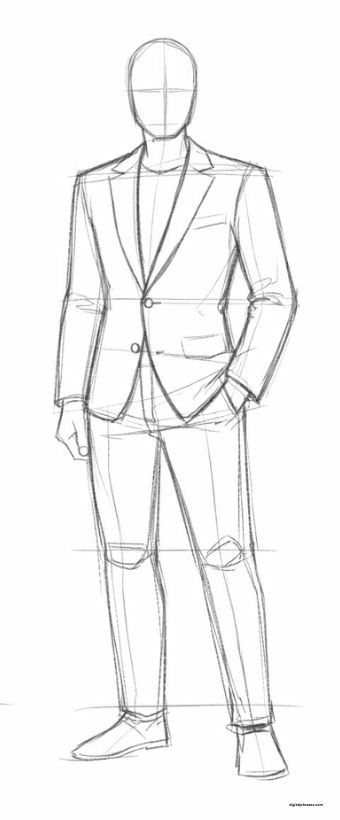
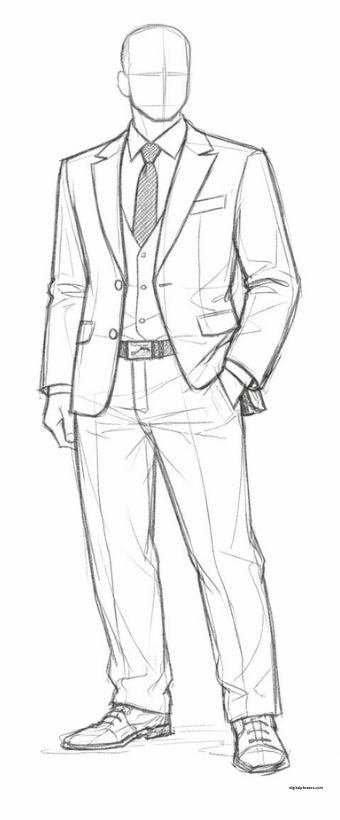
- Draw the jacket starting from the shoulders. A suit jacket usually has a structured shoulder, so the line should be crisp rather than droopy (unless you’re drawing an oversized style).
- Sketch the lapels: draw a V-shape opening from the neck area down the chest, then form the lapel edges with two angled shapes. Decide early if it’s notch lapel (common) or peak lapel (sharper, more formal).
- Add the jacket body with a slight taper at the waist. The jacket should widen gently at the chest, narrow at the waist, then fall toward the hips.
- Place the buttons and button stance (button position). A two-button jacket typically has the top button around the waist area. Make sure the front edges align cleanly on both sides.
Step 3 – Add Trousers, Shirt, and Key Details (Structure + Accessories)
- Draw the trousers from the waistline down. Keep the upper thigh slightly wider and taper gently toward the ankle. Decide whether the pants are slim, straight, or relaxed.
- Add the shirt collar under the jacket, then sketch a tie if you want a formal look. Make the tie knot sit neatly at the collar center.
- Include details that “sell” the suit: pockets, pocket flaps, cuffs, seams, and a belt line (or waistband if no belt).
- Indicate the crease line down the front of each trouser leg. This small detail makes the outfit instantly look tailored and professional.
Step 4 – Fabric Folds, Shading, and Final Clean-Up (Make It Look Real)
- Add folds where fabric naturally bends: under the elbows, around the waist, near the jacket buttons, at the knees, and near the ankles. Keep folds subtle—suits are usually smooth and structured, not overly wrinkled.
- Choose a light source and shade accordingly. Darken areas under the lapels, inside the jacket opening, beneath the arms, and between the legs. This creates depth and makes the suit look three-dimensional.
- Use cleaner lines on the final pass: trace the confident outlines and erase messy construction lines. Keep edges sharp around lapels and shoulders for a crisp tailored feel.
- Finish with texture hints (optional): tiny strokes for wool, smooth gradients for satin lapels, or a faint pattern for checks/stripes—just enough to suggest material without overwhelming the drawing.